After adding a Geometry resource to the timeline media layer, select Warp from the Controls Menu to access the geometry configuration panel. Geometry can be applied to a specific channel for display alignment (place it on the background layer), or it can be applied to a piece of media across the whole canvas by placing it on the same non-background layer as the media.
Timeline (i.e. used and edited) Geometry resources can be renamed, saved to the Resource Pool, or deleted.
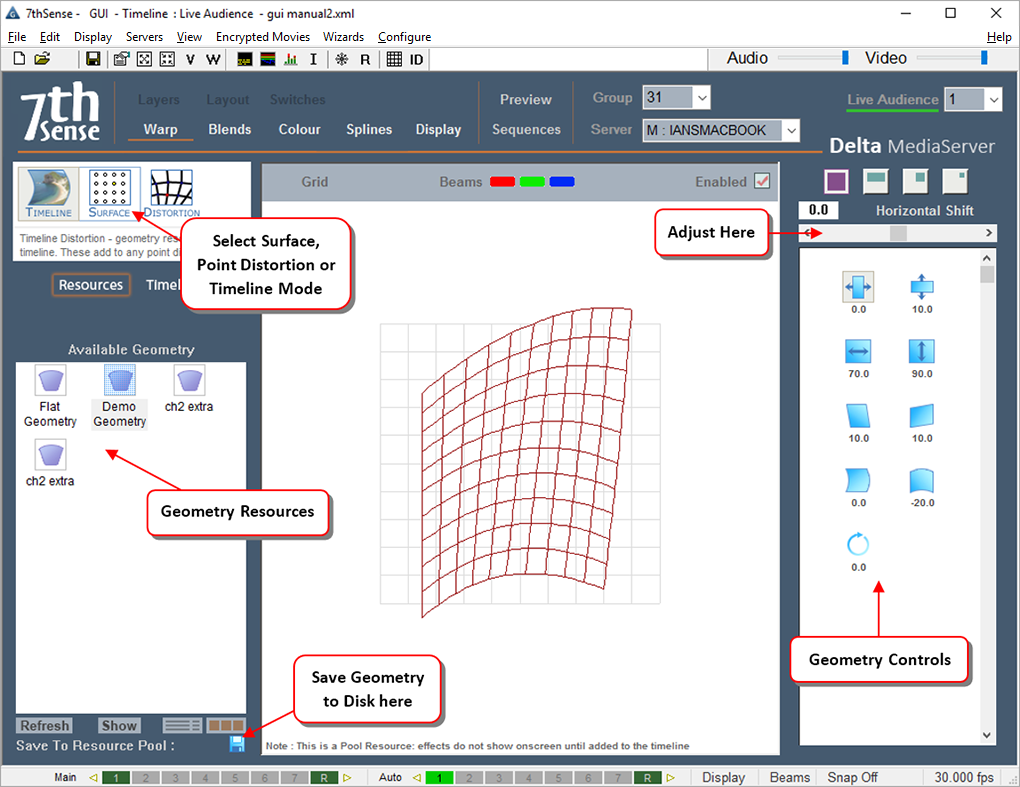
•To manipulate a geometry on the timeline, select Timeline on the left resource area, then the relevant geometry, and manipulate it using the controls on the right side of DeltaGUI.
•If you select Resources from the resource area and adjust the warp using the right-side controls, you are adjusting a pool resource (temporarily for this session only). You may do this in order to create a specific shape, then Save to Resource Pool in order to store it permanently on disk. It is then available for later use by dragging it onto the timeline.
There are three kinds of geometric warping:
•Timeline (bowing, skewing, stretching the image or channel)
•Surface (smooth overall distortion of the image or channel around midlines and corners)
•Distortion (distorting the channel as a interpolated grid, point by point, or by groups of points)
Multiple geometry resources can be applied to a timeline, and come into scope when the playhead passes the start position.
If you select a Geometry resource to Morph, the geometry of that layer (or the channel if it is on the background) will smoothly change shape from whatever previous geometry shape is there to be completely changed to the new shape by the start position.
Using Morphing, you can create nice fly-in / out effects, or shrink content down to size once something more interesting has appeared.
•The Enabled checkbox is used to temporarily disable geometry so you can see the undistorted image in preview mode. Note that there is a separate Enable checkbox for Point Distortion which is shown when you select that mode.