 Surface warp is an additional geometric distortion which is built into a geometry resource.
•Both surface and point distortion modes can be used at the same time.
•A surface-warped geometric resource can be placed on any layer, and affects the media in that layer.
•On the background layer, surface warp becomes Channel-based. (Point Distortion is still available on each channel and can be used together with any resource-based mode.)
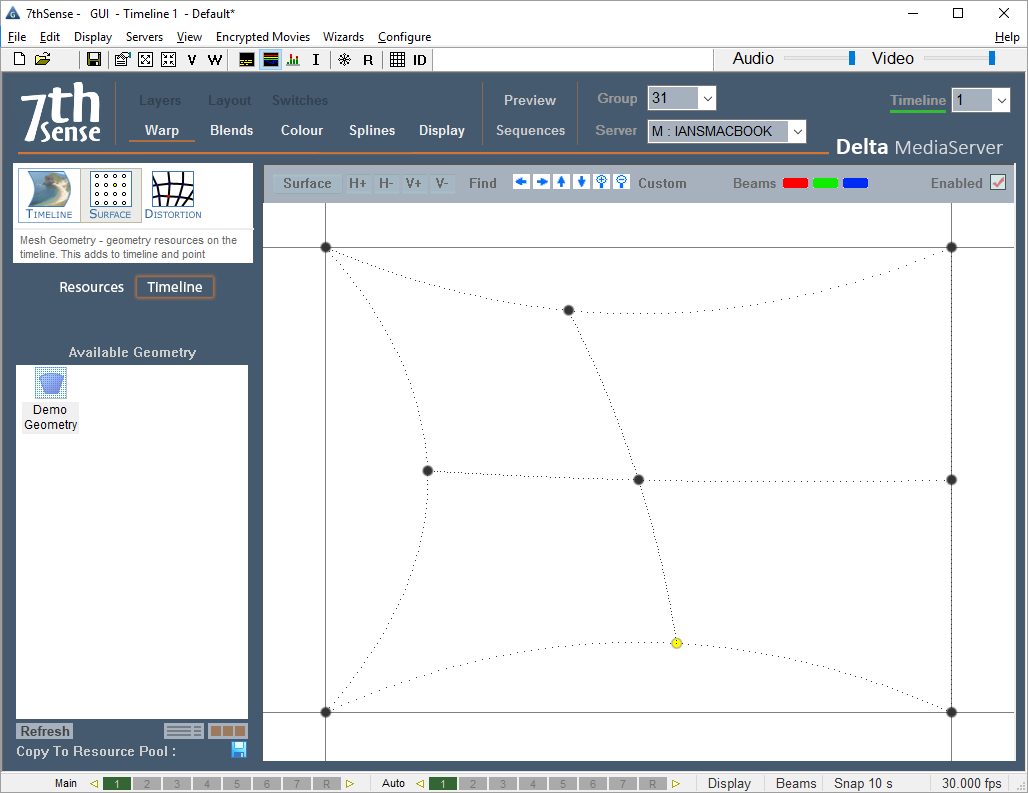
Surface mode is useful for quickly pulling the shape around with a mouse – you can choose the number of nodes, from only 4 in total, up to a 13 × 13 grid of points by pressing the H+, H-, V+ and V- buttons followed by the Apply button (or Enter). Note that the new grid density will follow approximately the shape of the original node count.
Warp Controls
Zoom in/out of grid |
blue buttons, or |
Reposition the grid in DeltaGUI |
blue arrow buttons, or |
Select a node or nodes |
arrow keys (first to be selected is bottom left), or |
Move a node or nodes |
Ctrl+arrow keys (fine control), or |
Add or Remove a grid line (row or column) |
H+, H-, V+, V- buttons |
Add a custom grid line (row or column) |
‘Custom’ button menu > Add Custom Line / Column |
Move a grid line (row or column) |
‘Custom’ button menu > Edit :Line / Column Reference |
Remove a grid line (row or column) |
‘Custom’ button menu > Remove Custom Line / Column |
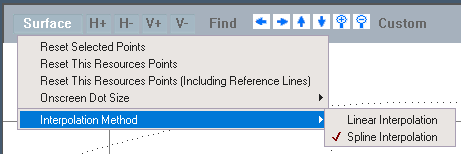
Under the Surface button, you can reset a selected point or points, or the whole grid, and also change from Linear Interpolation (straight lines between nodes), or Spline Interpolation (smooth curves). You can also change the dot size onscreen and reset points or the grid.
To find the active dot’s location, even if off screen, press the Find button – this highlights the X and Y lines leading to the selected node on the actual canvas. This will disappear automatically after 10s.