Jugglers in a system should be racked adjacent to each other, since optical connections must be short and loop freely. If you are using multiple Jugglers on a data bus, make these connections first, before inputs and outputs; they can become quite congested with many units.There are two bus configurations, 4 and 8 lane, with each lane having a capacity of up to the equivalent of UHD 60 fps 10-bit 4:4:4.
Please note that as a critical component, optical cables used should be supplied or approved by 7thSense. Cables do not need to be short but the minimum bend radius of a free-hanging cable should be not less than 10 times the cable outside diameter. |
This page covers the physical cabling of a single bus. For an explanation of how this works, and the use of the data bus in the Compere software, see the relevant sections in the Compere 1.0-5 User Guide:
➢Bus Connections in a Juggler System (bus individual inputs)
➢Bridging Two 8-Lane Buses (e.g. to provide redundancy)
➢Output Canvas Bus (bus the whole canvas)
How your Juggler system is bused will depend on your overall requirements, and can include combinations of bus types.
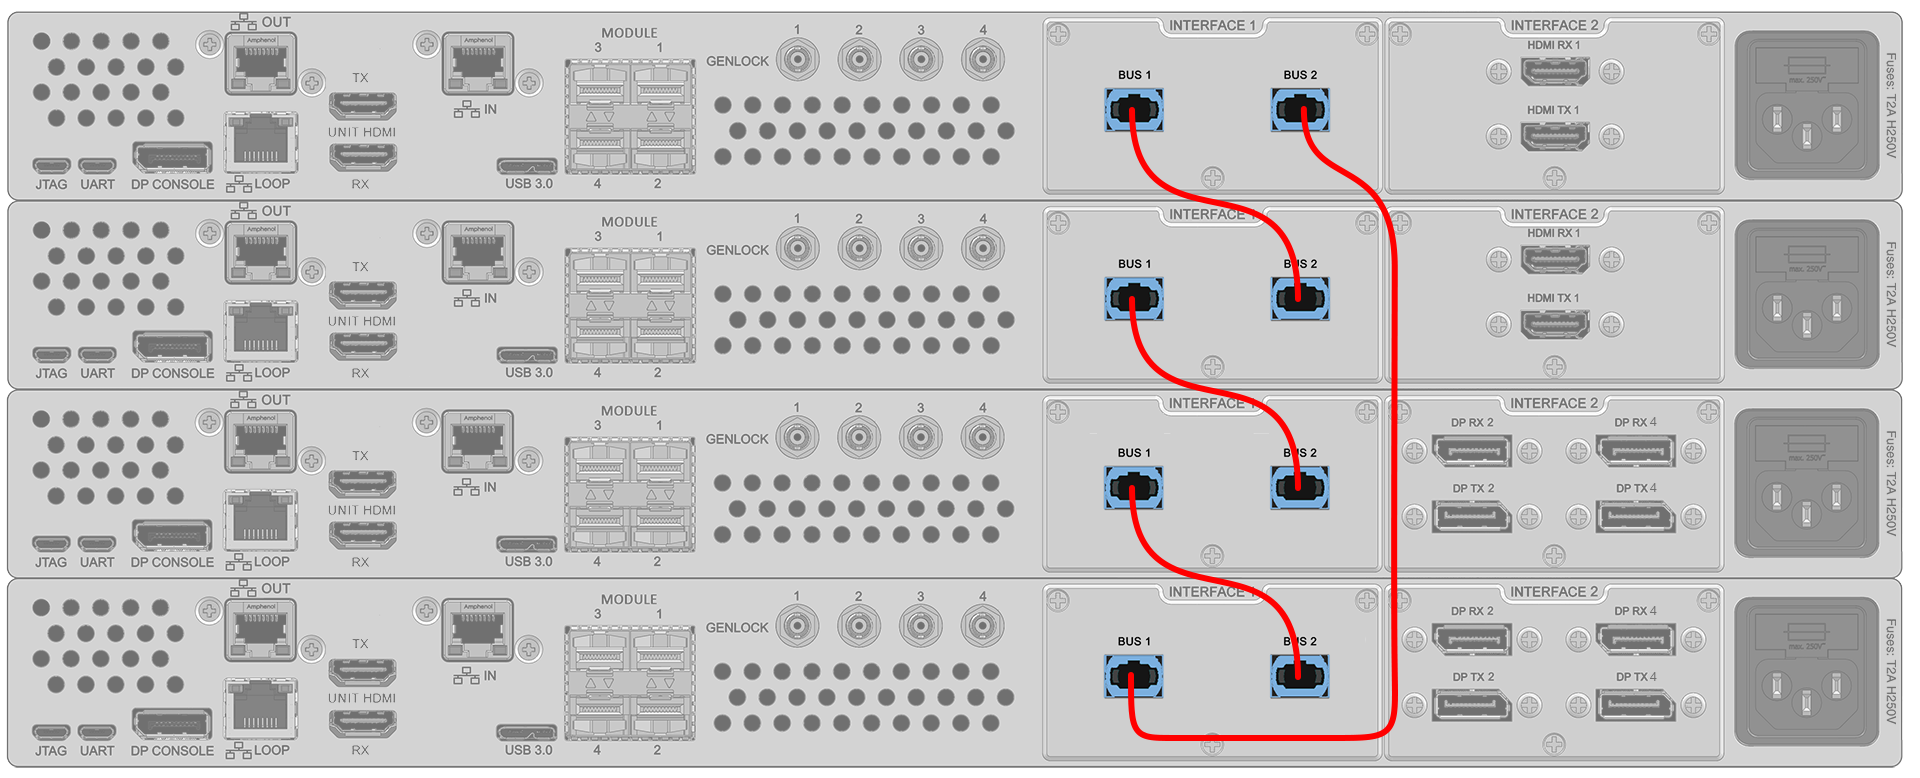
8-Lane ‘Full’ Bus
With the MPO (Multi-Fibre Push-on) optical fibre option, twice the bandwidth is available. Each fibre-optic cable carries 8 lanes, 4 in each direction:
Units are daisy-chained unit to unit, 1 to 2 and loop back from the last unit to the first in the same way.
Cables
Use MTP/MPO 12-fibre 50/125 patch cables, type B, Female to Female.
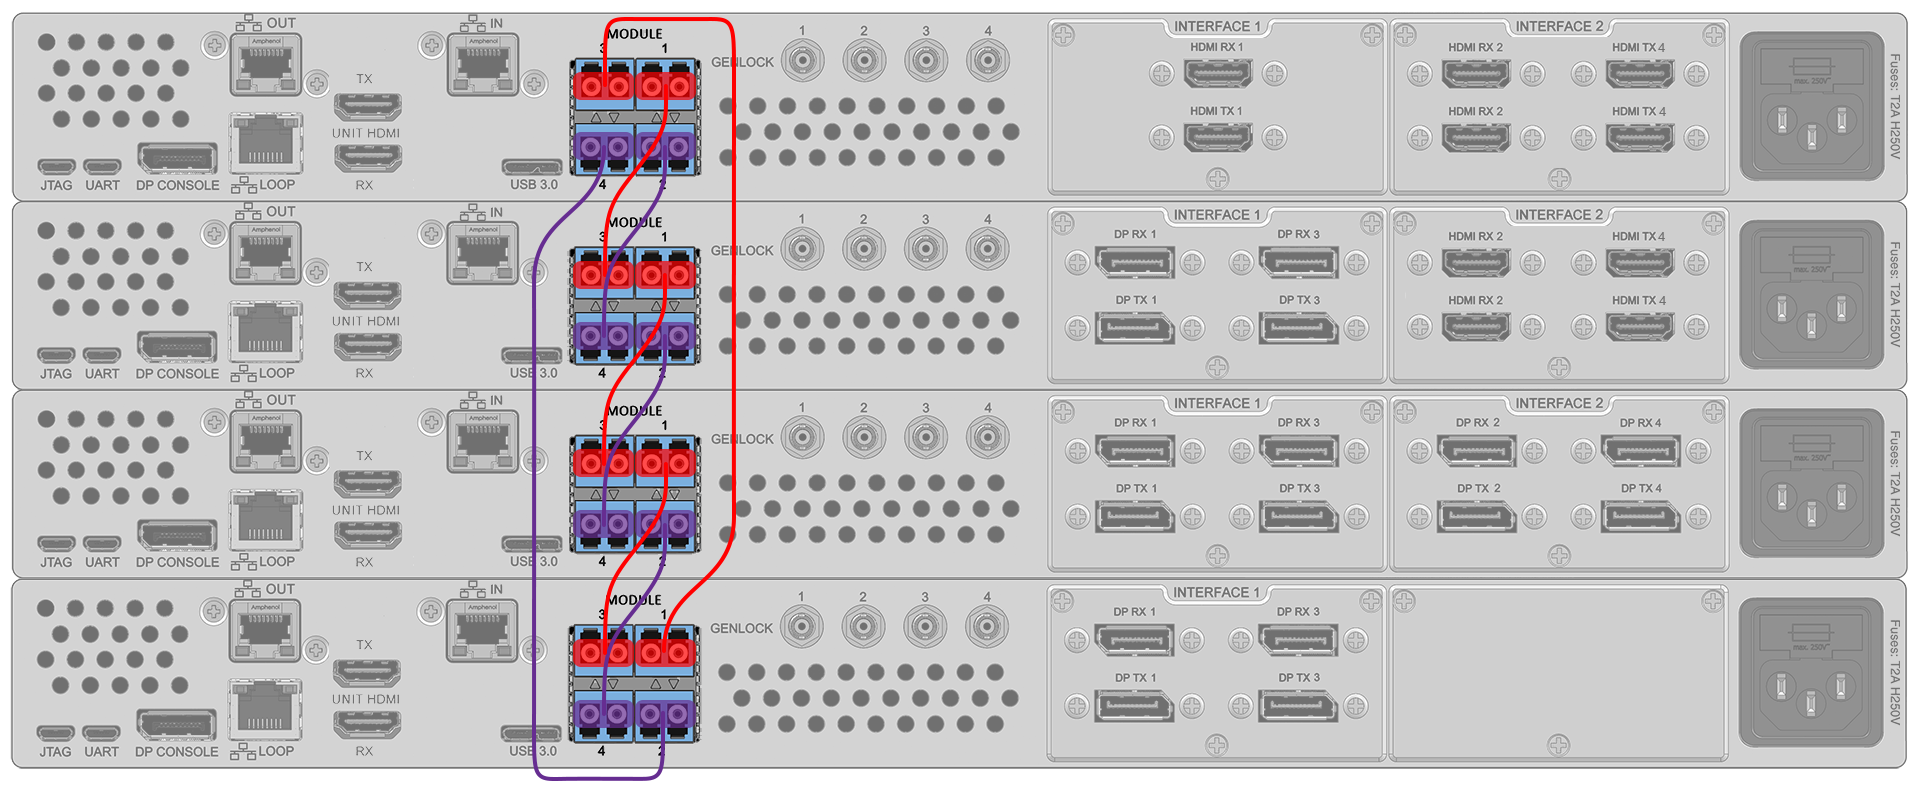
4-Lane ‘Half’ Bus
Using the ‘half-bus’ optical transceivers, Juggler modules can be bused together using on-board SFP modules. Each fibre optic cable carries 1 lane in each direction.
Units are daisy-chained progressively unit to unit, 1 to 3, 2 to 4 and loop back from the last unit to the first in the same way.
We recommend the use of paired crossover patch cables, which will have colour or tag identifiers. It can be helpful to choose an identifier to work with (yellow, a number etc.) and keep these on the outside as you work down one side and up the other.
Care with Optical Connectors
Cleaning Optical Connectors The most common problem with fibre optical connectors is contamination – residues or dust. Plastic easily generates static, which attracts fine particles, too small to see with the naked eye, and any contamination will affect performance or cause failure. Avoid troubleshooting by inspecting first. Inspect before you connect Hand-held fibre inspection microscopes may seem expensive, but prevention is cheaper than troubleshooting, and it is essential to ensure optical connector end-faces are clean before you connect. Problems arise when components are left unconnected and uncapped, so keep caps on until the point of connection. Residues can even be present in an out-of-the-bag cable, or from the moulded cap itself, and can transfer to a bulkhead connector. Inspect, clean, reinspect We recommend that the polished ends of fibre leads should be cleaned with a push-click pen cleaner. Dry cleaning is always recommended; alcohol-based agents should not be used. Specialist cleaning kits are available that ensure contaminants are not just moved about, or reintroduced by a second use of a tool. After cleaning, reinspect. You may still have contamination. Do not connect until you know a connection is clean on both sides. |

