In this mode, pairs of Delta channels are interleaved in time, and a single output is sent to a single projector. Since we want to maintain sufficient update rate for each eye, this single output from Delta has to run twice as fast as the passive stereo solution, as does the projector. Shutter glasses, synced to the stereo output of Delta, are synchronised to only show each eye the relevant image, creating the stereo depth.
The Eye Separation (IOD) is set here to use Delta’s layers as additional planar shift to create artificial depth. This defaults to 0, which means not using layers to create depth, relying on the depth within the content.
Configuration
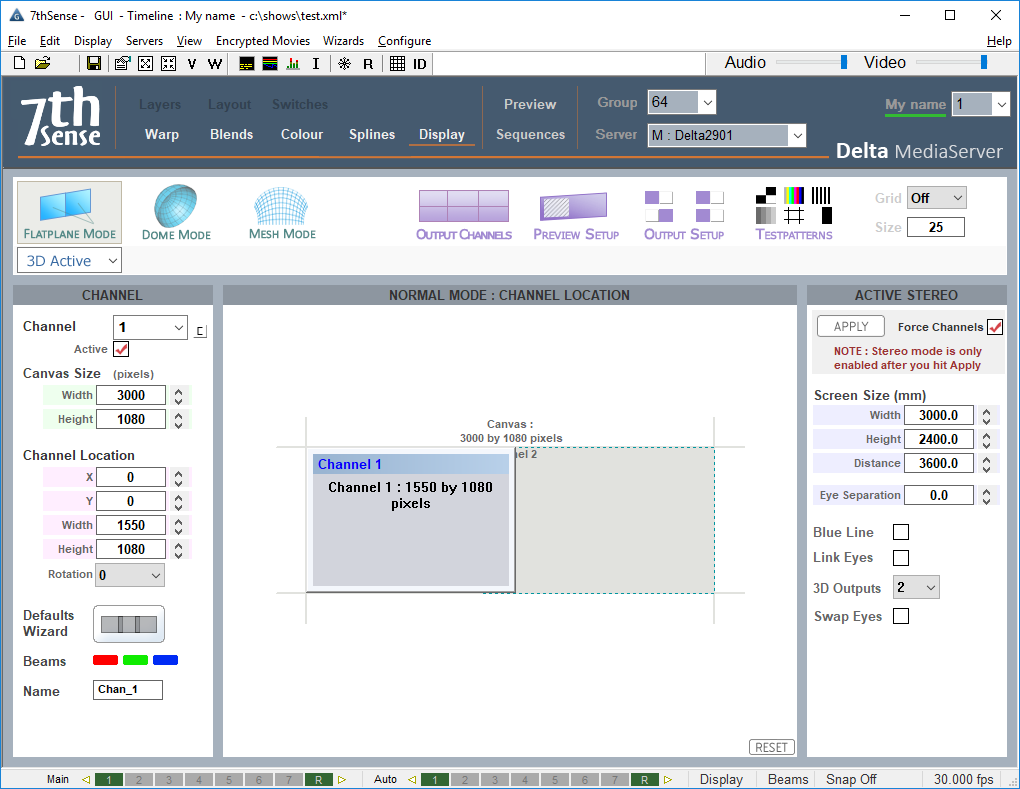
Choose 1 to 8 × 3D Outputs and press apply – pairs of channels are made active, and the second channel is copied over the first so they are overlapped. If the checkbox is not checked, your existing channels are left untouched, so you can configure passive stereo as required. Note that odd channels (1,3,5,7) are always left eye and even channels (2,4,6,8) are always right eye. You can configure content to be on left or right eye by editing the resource and change the Eye parameter.
Blue Line mode
places a quarter-channel width blue line on the last line of video for the left eye and three-quarters-width line for the right channel. Some active stereo projectors support this mode in addition to the traditional stereo sync input.
Link Eyes
links the geometry, colour and blending from channel 1 onto channel 2, channel 3 onto channel 4 and so on. In this way, both channels fed to a single active stereo projector are adjusted at the same time if the control is placed on an odd-numbered channel.
Note: You must press [Apply] in order for stereo to be active |
Force Channels
if this is checked, pairs of channels are made active and the second channel is copied over the first so they are overlapped. If the checkbox is not checked, your existing channels are left untouched, so you can configure passive stereo as required.
To use Delta’s layers as additional depth, for both Passive and Active Stereo, simply enter the screen and Eye-point locations and size, and choose the Eye Separation to match your system – these values affect only the additional stereo separation activated per layer (layer 1 has most separation, background layer has 0 separation).
A typical Eye Separation is 65 mm, though this value can be experimented with to achieve the right amount of stereo. Beware of using too much separation, as this can make objects appear behind the observer’s head, causing discomfort.
The Canvas and Screen location can be entered so that one PC can play the left half of a stereo screen, another the right half – enter appropriate Channel values to cover the left and right half of the canvas in this case.
Typical Requirements
•One projector per output, fast enough for the higher video rate
•One channel output per projector from Delta using stereo-capable graphics card (requires optional stereo licence)
•Shutter glasses or Z Screen
Pre-Rendered Anaglyph Stereo Content
If an anaglyph movie has been rendered into left eye / right eye already, the Eye separation should be set to 0.
Alternatively, place this on the background layer, which has no additional eye-offset applied by Delta.
Left Eye or Right Eye Separate Movies
After placing left and right eye movies on the timeline, you can edit each resource to move it to the left eye or right only (pre-rendered for that eye).
Left/Right or Top/Bottom Configuration
Some movies come with both eyes as left/right side by side, or top/bottom, this can be selected in the resource dialog.
Stereo Wizard
Choose DeltaGUI menu Wizards > Create Stereo Show.
•On the first page, select the Left and Right eye movies
•On the second page, choose which audio files to include and the FPS of the audio files
•On the last page, choose Passive or Active, whether to add a loop, and if there is any time offset between audio files and movies.
Press [Create], and the timeline is populated, ready to play.