First import the .obj from which the warp files were created, into the Visualise panel. Here it is represented in 3D as a display surface.
Add the set of warp files
Drag the .wrp7 set (VirtualCanvasSet) that you ingested, from Asset Manager into the Region Sets tab of the Warp Mapping panel.
Note: Asset Management uses the name of the single folder from which all the generated .wrp7 files were ingested, rather than the CanvasSet name (‘Notes’ field in the JSON sidecar file).
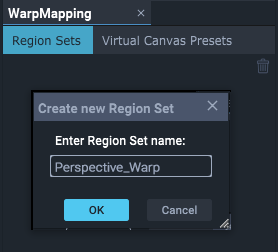
Enter a name for the new Region Set in the dialog presented as you drop in the warp set:

There is now a named Resource Set in the Project Tree.

Add regions to the RegionSet
Right-click on the Region Set name in the Project Tree, and select ‘Add region’ to add new regions to the set. Name each according to how you want to reference it.
Note that all regions must be added before creating a virtual canvas preset.

Region data (size, position) can be edited in the properties panel, or in the Visualise panel (see below).