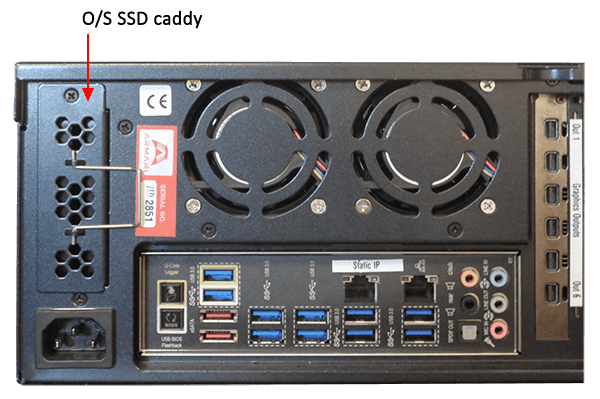
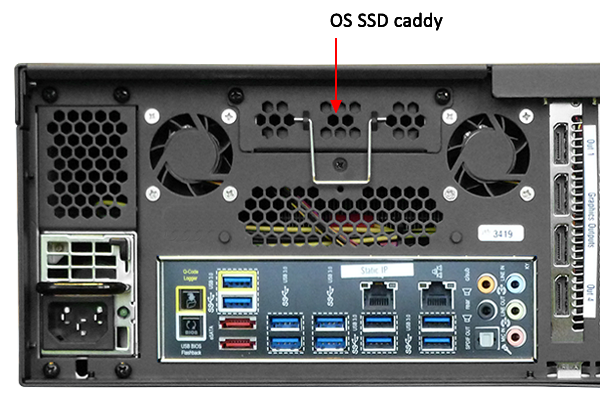
Most Delta Media Servers have a removable O/S drive caddy. (See Back Panel Connections, and this is also true of older models.) This carries the O/S and all C:\ drive drivers and configurations, media and resources. It is important to keep a clone backup of this post-integration, in case of drive failure, so that you can restore the server to operation quickly.
For Delta 2.5 and above, the optional Stack Backup and Restore facility can do this. The alternative is to use Paragon backup/clone software.
As with all components O/S drives can begin to fail with age. Signs of an approaching failure can include intermittent boot failures on start-up, which are superficially remedied though reboot. Generally, these issues come on slowly, increasing in frequency until final catastrophic data loss. If boot failures begin to present themselves heed the warning, ensure full backups are present, and that you are confident in the process of OS restoration/deployment to a new drive.
Preventative maintenance is of course always preferred route to ensure the least possible downtime for the user. In case of C:\ drive replacement, you will need to know the following in order to fully reconfigure your system (see Installation Records):
•graphics configuration (Eyefinity for AMD, Mosaic for NVIDIA)
•graphics EDID
•graphics driver and version
•server IP address, and any IP configurations
➢see Display Configuration for Delta Servers
Power down the server.
Remove the two retaining screws for the caddy:
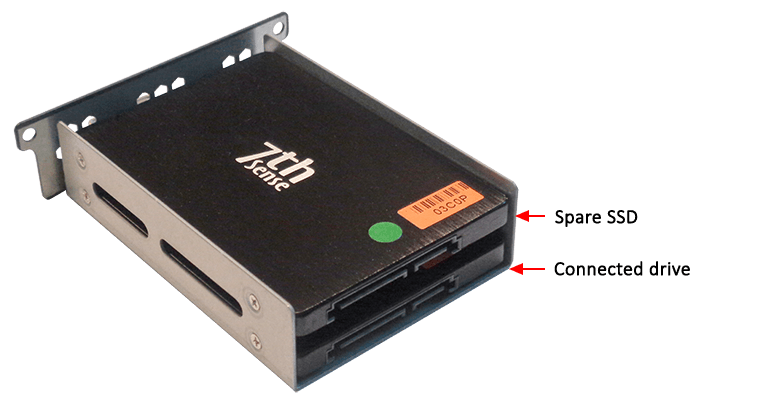
In the caddy, there are two SSDs: one for the C:\ drive and one spare, containing a factory-settings clone. The caddy is secured by two screws, which when released allow the tray of two SSDs to be withdrawn from its internal connectors:
The SSDs are each held in place by four small screws. The upper disk is the spare (factory clone), and the lower is the C:\ drive.
•Mark the spare drive replacement (e.g. write ‘R’ on the green sticker) and remove it.
•Remove the failed or failing SSD, label it appropriately (source, date, type of failure), and keep it, with its four mounting screws. Do not reinsert it back in the server.
•Replace the spare SSD in the lower position.
•Replace the caddy in the server and secure it with the original two screws.
•Purchase a replacement SSD from 7thSense, in the event of a subsequent failure.
Restoring the C:\ drive
The factory-clone image on the spare SSD will provide your operating system. You will need to restore a backup of all your media and resources, and if you do not have a clone of the previous SSD, you will need to reconfigure your graphics card(s). Only use the driver originally provided for this, since these have been tested with the card(s) in the server.
Create your own clone
The alternative is to create your own backup clone.
Page edited [d/m/y]: 23/06/2022


