With DeltaServer running and the Playback Window in full screen, select Mesh mode in DeltaGUI. Choose your required 2D or 3D media mode from the Mesh Mode drop-down:

There are three control panels here:
Channel Panel: Setting up your Projectors
Here you set the projector positions as in any mode. The process of calibration will automatically make fine adjustment to these.
As for any mode, select the active channels you will be using, with the small ‘C’ button.
Note the two places where channel beams can be switched on and off: in the foot of the channels panel (click the colours), and bottom right in the DeltaGUI status bar. You will need to switch beams off for calibrating individual channels. Do not deactivate channels for this operation. |
The defaults wizard dialog behaves the same as Dome Mode, but be aware you are typically arranging channels around an object at a centre, so use Projectors Outside Screen. Note that ‘Include Cap’ is not relevant to this mode.
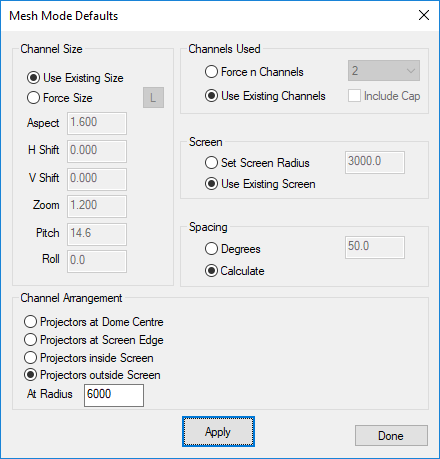
Channel Size
Select from the two options. Use Existing Size (if the display model is the same as previous show) or Force Size and type in the settings according to the design guidelines.
Channels Used
Select the number of channels (projectors) in ‘Force n Channels’, or ‘Use Existing Channels’ if active channels already set up.
Screen
Set screen radius here if using ‘Projectors at Screen Edge’ in channel arrangement, or Use Existing Screen if using ‘Projectors outside Screen’.
Spacing
If set to Calculate, projectors will be assumed to be all-round, in equal divisions of 360°. Changes to each projection can then be adjusted accordingly at a later stage.
Channel Arrangement
For Projectors at Screen Edge set a screen radius above; for Projectors outside Screen set a radius here.
At Radius
This is the visualised distance from the object origin.
Mesh Canvas Panel
Canvas Size
Your dimensions here for projected (not textured) mode will be defined by the media.
Render Size
This is for tuning performance by reducing resolution to decrease the load on the graphics card. (Preserve the aspect ratio.)
Active Render
This is the location of the render on the overall canvas.
Mesh Panel
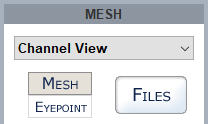
Here, you have five different views:
•Channel: shows the view of the mesh surface covered by (as ‘seen’ by) a single channel i the GUI. It is here (or Interactive view) that you set a fixed eyepoint.
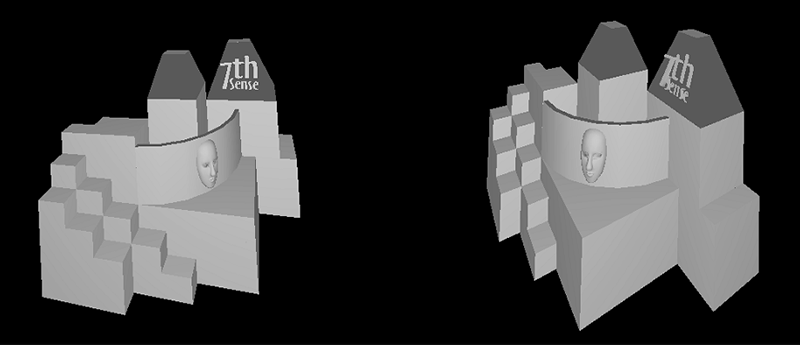
•Interactive: allows the whole model, axes and projector frustums (yellow lines) to be rotated and viewed in the playback window:
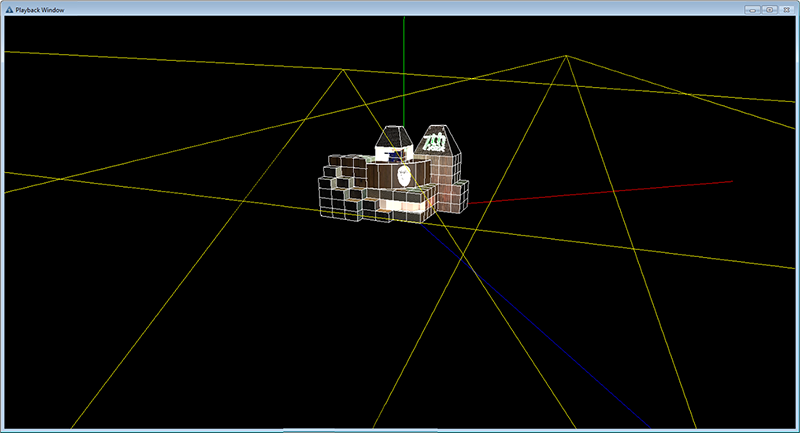 |
•3D Projector Calibration: place the mesh vertices on the actual canvas points
•Mesh Editor: alter the mesh by overlaying adjustments
•Movement Nodes: synchronise media movements between eyepoints and between meshes.
For projection mode (not textured) you must know the design eyepoint for the media, for each channel. |
Mesh Dimensions
3D models are ‘ideal’, and even if used as the basis for constructing the actual real-world object (our canvas) there will be differences. DeltaGUI provides for all reasonable adjustments, but the mesh model must be accurate and to scale. Beyond this, the mesh itself may require editing.
•First of all, the eyepoint of the designer/viewer must be related to the origin (X, Y, Z = 0, 0, 0) of the mesh model.
Typically left as 0, 0, 0, you can reposition the object away from its inherent origin if necessary.
•If there is a difference in the scale of the model and the actual object, this must be adjusted.
Set to 1.0 by default. You can adjust the size of the model if the object dimensions are not fully to scale, but of course the projector locations may then have to be altered to account for the new object size.
•If there is any difference in heading, pitch or roll of the actual object from that expected by the projected media, these too can be adjusted.
Heading, Pitch and Roll values are in degrees. The 3D object may come in rotated about the wrong axis, so you can correct this here.
Mesh (.obj file) Selection
For DeltaGUI and DeltaServer to work together, each mesh .obj file must be on both the DeltaGUI PC and the server, in C:\meshes. When you assign a mesh in DeltaGUI, a copy of the server mesh will be synced to the DeltaGUI PC. Their filenames must stay the same in both locations. |
In Channel view, select both mesh and eyepoint for each channel:
Double-click an ID line to add or to remove a mesh from a channel. You can apply multiple meshes per channel, up to 16 per show.
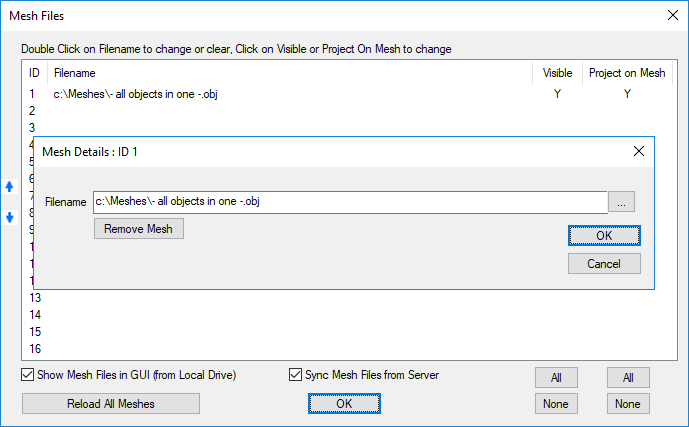
Visible
A mesh can be assigned but only be visible in the GUI, not playback, by selecting No.
Project on Mesh
If you do not want media to appear, but you still want to be able to see and illuminate the object with the grid off, a mesh can be rendered in greyscale.
 |
Eyepoint Selection
In this example (not a textured mode example), it is assumed that this eyepoint will apply to all meshes in all channels. Each mesh can have a different viewpoint or more than one viewpoint. Different meshes can share the same viewpoint. Eyepoints are available to all, or selected channels only.

Using texture coordinates with UV-mapped media means that the model, grid, media and object can all be aligned in one calibration operation.
Eyepoints can also be assigned to media by right-clicking the resource on the timeline:

Enabled:
Enable or disable this eyepoint. Disabling will hide related meshes.
Use Texture Coordinates:
Enable this if the .obj file contains texture coordinates, if you enable this and the model has no texture coordinates, nothing will show on this mesh. Disable this, and the flat plane canvas will be projected from an eyepoint configured in the GUI.
Use Depth:
Enable (default) to have occlusion between meshes, disable and the meshes will not occlude against each other (determined by the order shown in the mesh files dialog).
Orthographic:
Choose this to have an orthographic (non-lens based) eyepoint, note this only applies to a Projected (non-textured) eyepoint.
Enabled Meshes:
Choose the meshes related to this eyepoint.
Enabled Output channels:
Choose which output display channels will render this eyepoint.