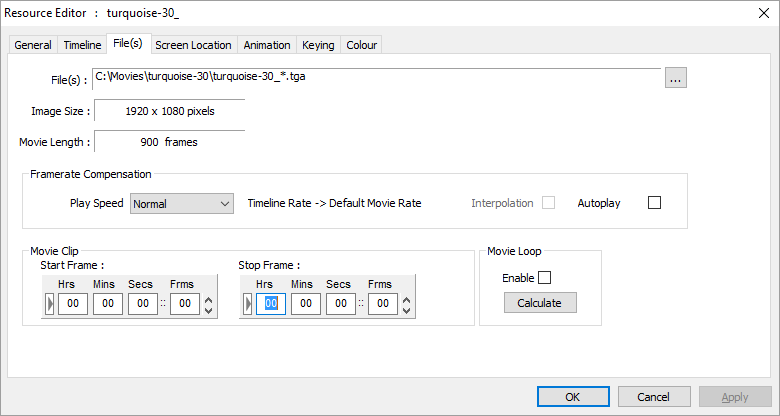
The Files configuration tab for Images simply shows the full path to the file. For Movies resources there are configurable items as below:
The ![]() button allows manual editing of the file details.
button allows manual editing of the file details.
The Audio checkbox (appears with a codec resource) allows you to specify if audio contained in a movie file should be played.
Video Framerate Compensation
The Play Speed allows you to perform video framerate conversion, for example, playing a 24 fps movie at 25 fps, but maintaining the right movie length in time.
Since Delta gets its timing from the graphics card refresh, ideally, this should always be set to a multiple of the movie framerate, so for example a 24 fps movie would have the graphics refresh set to 48 Hz or 72 Hz (the lower value is preferred).
If this is not possible, you could set the graphics refresh to 50 Hz, so now, playing a 24 fps movie at 25 fps makes it 25 / 24 too fast. To correct this, choose the Play Speed of 24->25 fps.
To perform this conversion, frames must be dropped or shown twice in order to maintain the correct rate. This may lead to disturbing jumps in the movie, but this is dependent on the movie content and the difference between movie actual and desired rates.
To minimise the size of frame drops, set the timeline rate to a higher rate, so in the example above, choose a 50 fps timeline rate, and enter the custom conversion rate in the box provided:
Actual Movie rate |
= 24 fps |
Graphics Refresh |
= 50 Hz |
Timeline rate |
= 50 fps |
Movie Custom Ratio |
= 24/50 = 0.48 |
Movie Interpolation
If you have to use video framerate conversion, for example a 24 fps movie on a 30 fps timeline, you can turn on Interpolation, where extra inter-frame information is created in realtime based on the time error at that point to improve the smoothness of motion.
AutoPlay
Enable this to make the movie autoplay – as long as the playhead is in scope with the movie, the movie is playing, even if the timeline is stopped.
The Start Frame is that frame number on disk that you want to start using, so for instance, if set to the above example of 100, the first frame shown will be frame 100, wherever on the timeline you placed this resource.
The Stop Frame is that frame number on disk to stop at. Setting this allows you to loop the movie from a start frame to a stop frame.
Example: The Start Frame on this dialog is separate from the Timeline Position value on the Timeline tab, so for example:
•300 frames found on disk for sphere.tga (sphere _0001.tga, sphere _0002.tga etc.)
•Position the movie at frame 5000 (Timeline Position = 5000 to 5299)
•Set the start frame to 100 (Timeline Position is now 5000 to 5199), starting at sphere_0100.tga onwards
•Press Play
The timeline advances until it reaches frame 5000, then the 100th frame (sphere_0100.jpg) is shown at 5000, 101st frame at 5001 and so on for 200 frames.
Movie Loop
The Movie Loop checkbox allows you to drag the movie out on the timeline longer than the number of frames – the movie will seamlessly repeat. Use the calculator if you want to work out the length for a set number of loops.