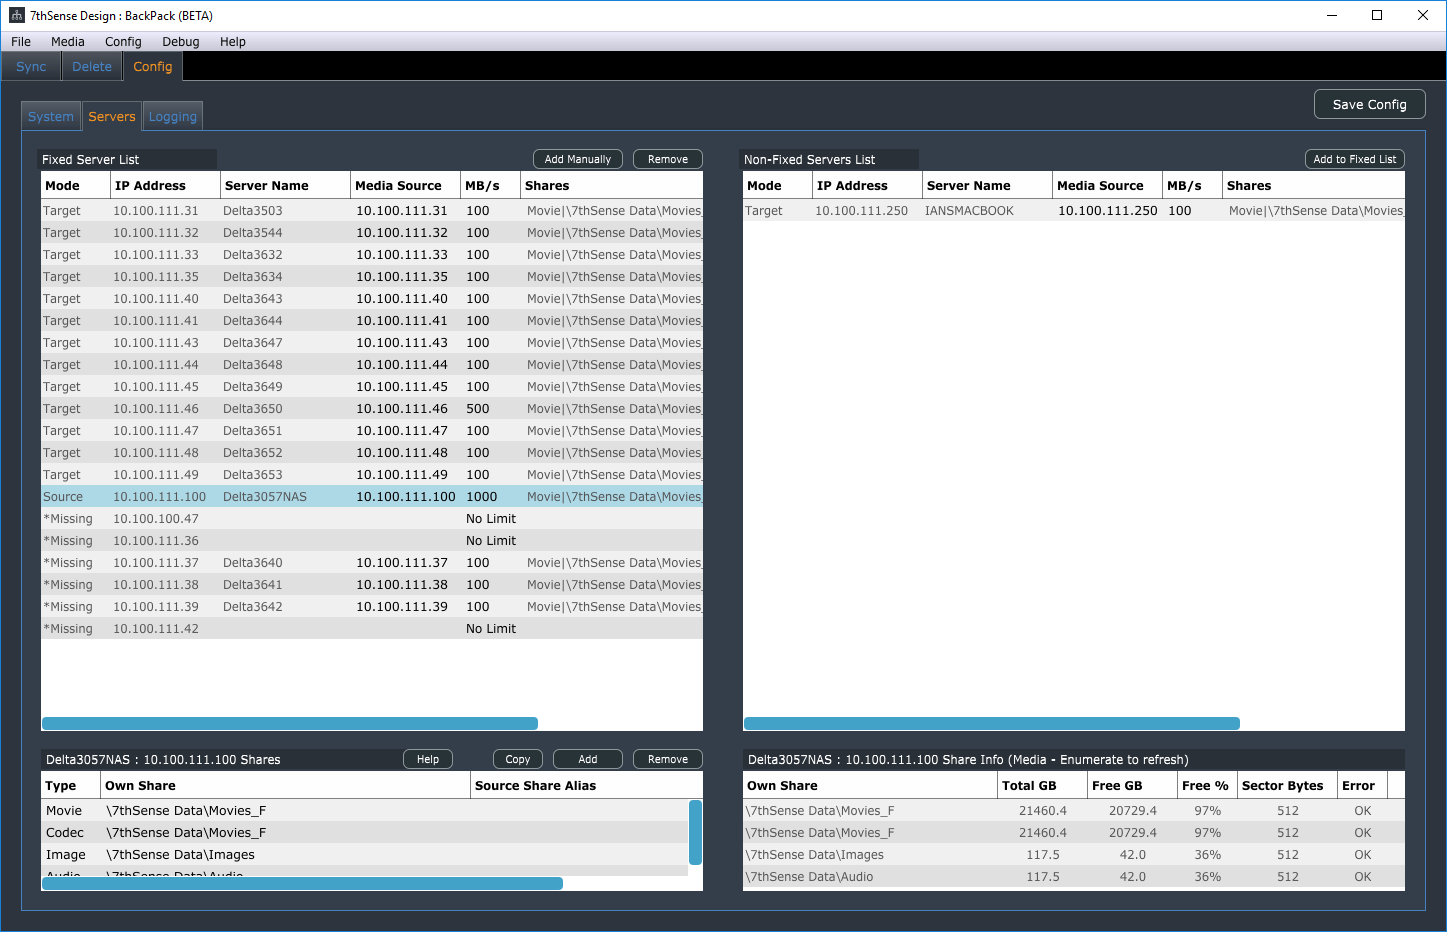
There are two tables, one a Fixed Server List and the other a Non-Fixed Server List.
A server in the Fixed table will be shown in the Sync/Delete pages whether it has connected or not (it is greyed out until connected). This allows you to have a known set of servers in the list even if they have not yet appeared.
All other servers not in the Fixed table will be shown in the Non-Fixed table as they come online – you can move them into the fixed list as required, by selecting them in the Non-Fixed table, then clicking Add to Fixed List (above the table). You can remove a fixed server from that list by selecting it and clicking Remove (above the table).
Click Add Manually to add any IP address to the Fixed list.
Once you press Save Config, the Fixed List of servers will be saved to all servers (Config.XML), but this list is only read from the Source server once it arrives.
In the table, the Media Source IP and MB/s (local server throttle) can be set for each server by clicking in the MB/s box and editing its value.
Note that the Fixed List comes only from the Source server, so the Sync grid of tick boxes will not show until the source server arrives. To see Non-Fixed servers any time, choose Menu > Config > Servers > Show Non Fixed Servers. |
Media Source
A Source server will usually have the Media Source set to its own IP so that it finds media assets on itself. However, to use a server as a Proxy to another server (or some other SAN / NAS), enter the remote Media Source for that server. This can be an IP Address (10.0.1.223) or a DNS Name (MyNAS), but bear in mind the network infrastructure must resolve the DNS Name to an IP for this to work.
When a different Media Source to the server’s own IP is set, that server will show:
Server Name : Own IP Address (Src=Source IP Address).
examples:
10.0.1.200 : Delta Nano1 (Src=10.0.1.244)
10.0.1.200 : Delta Nano1 (Src=MyNAS)
When a server is used as a proxy, it will ignore its own media assets and enumerate from the Source IP server, so this server must be active when DeltaMonitor starts or is asked to Enumerate from BackPack’s Media menu. The Own Shares as described below should be set to shares that exist on the Source IP server, as shares on the proxy server will be ignored.
See below for Share Aliases.
Shares
By clicking on any of the servers in the Fixed or Non-Fixed server lists, the Shares table is shown as below.
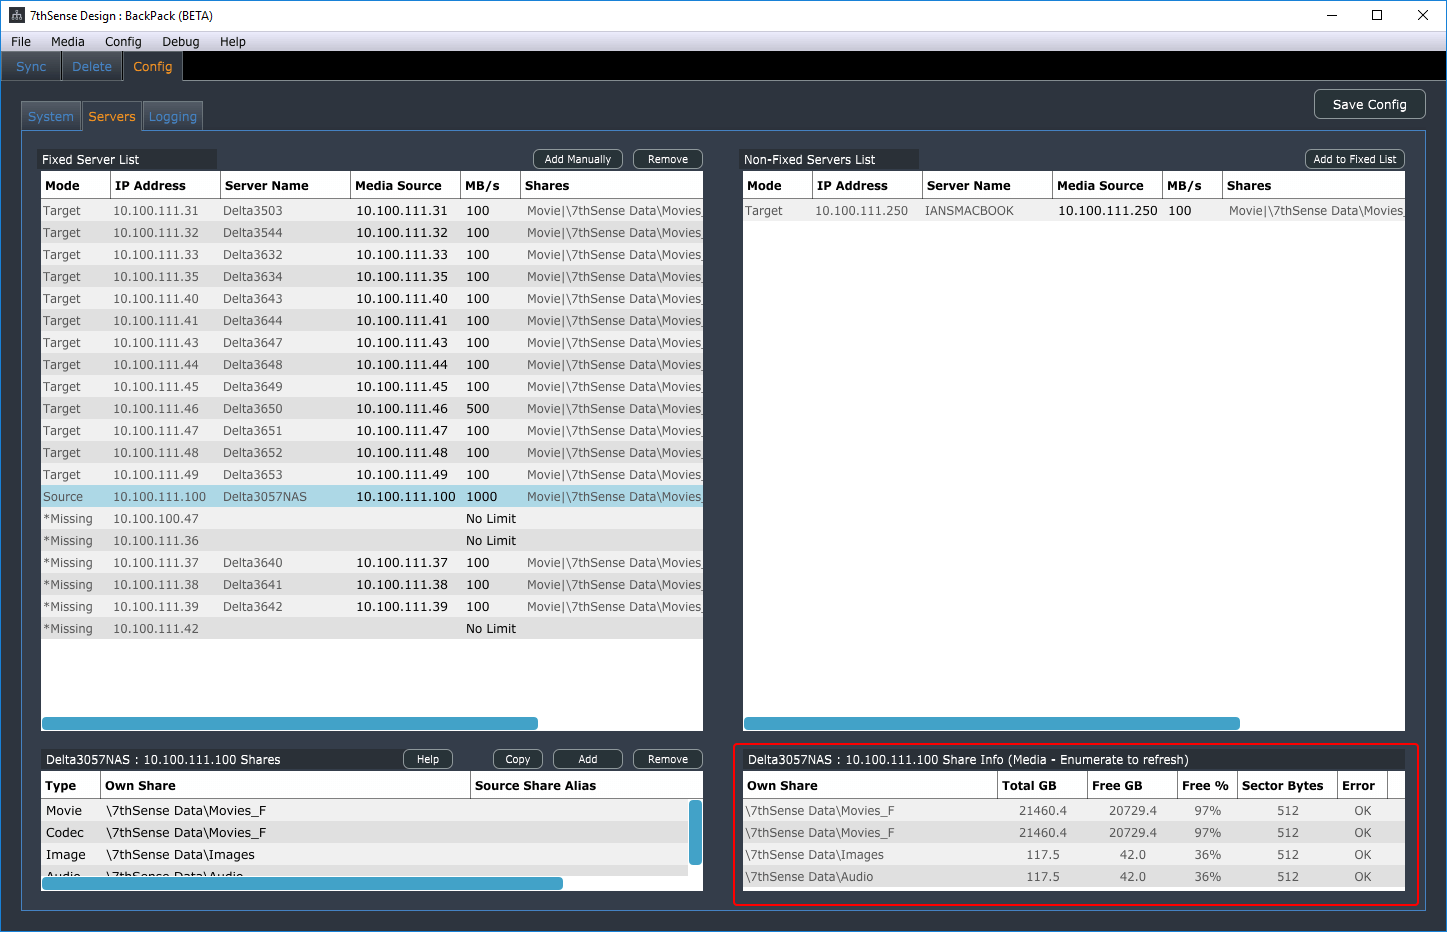
Share Information Panel
This panel displays the free disk space, sector bytes and any Windows System Error Codes (see Microsoft: System Error Codes). Example: error 53 means network path not found, error 54 means network busy. Note that for a share which is not there, inaccessible or spelled wrong in BackPack, it will likely return one of a few different error codes, but they all indicate the same thing, that it can’t access the share.
This share information is updated when you Save Config, when the server first arrives, and after an enumeration of that server.
When DeltaMonitor starts, it enumerates (gathers a list) of media as found in the Share list, so for example, on the 192.168.1.133 server, Media is arranged via Window Shares named like this:
\\192.168.1.133\Movie Drive\Movies\Common |
(Movie media) |
\\192.168.1.133\Movie Drive\Movies\Codecs |
(Codec media) |
\\192.168.1.133\Images |
(Image media) |
\\192.168.1.133\Audio |
(Audio media) |
When this server starts up, it works through these shares and finds relevant media types, then keeps this is a list until BackPack requests it.
Note that the shares are entered by hand as below, so they must exist on the server for this to function. You can check by using Windows Explorer with the IP Address / Share to see if it exists. If you get no media or missing media, try Menu > Media > Enumerate (choose server), also check the share exists and can be accessed without logging in with a username / password. |
Add
Adds a share at the end (or after a selected share), then edit the media type and share location
Remove
Removes the selected share
Copy
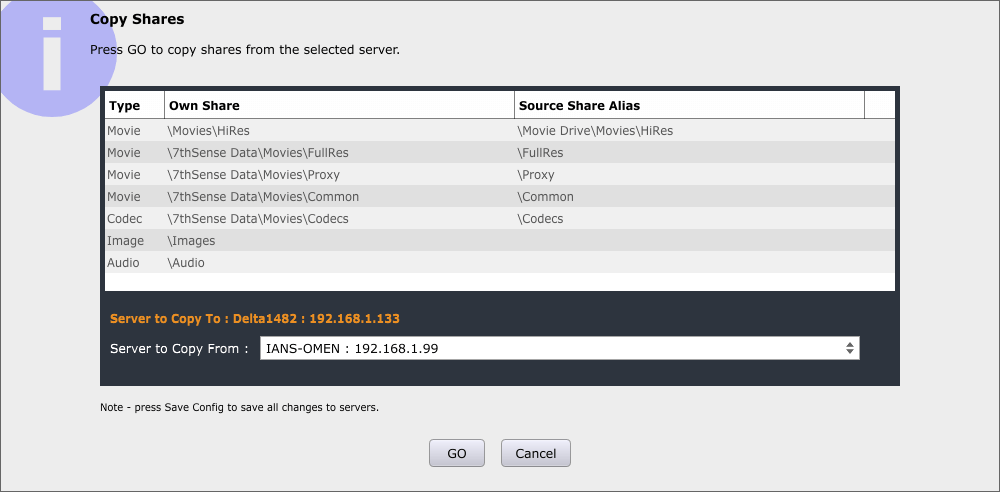
Copy shares from another server.
This is only saved to servers after pressing Save Config.
Source Share Alias
If all servers share the same path structure, then comparing and copying / deleting files would work without any aliases. However, it is common for differently configured devices to have a partially different path structure so that it makes sense on the device. Aliases allow the target server file / folder to be compared to the source server file / folder even if they have different share structures.
Example with identical structure (no alias required)
Source Server |
Source Share |
Source File |
Target Server |
Target Share |
Target File |
|---|---|---|---|---|---|
192.168.1.100 |
\Movies\Common |
Animate_*.7TH |
192.168.1.88 |
\Movies\Common |
Animate_*.7TH |
192.168.1.100 |
\Images |
Colours\Blue.jpg |
192.168.1.88 |
\Images |
Colours\Blue.jpg |
192.168.1.100 |
\Audio |
Mp3s\loud.mp3 |
192.168.1.88 |
\Audio |
Mp3s\loud.mp3 |
Since the source and target shares match identically, the command to copy source onto target will work without any aliases in the share.
Example with different structure (alias required)
Source Server |
Source Share |
Source File |
Target Server |
Target Share |
Target File |
|---|---|---|---|---|---|
192.168.1.100 |
\Movies\Common |
Animate_*.7TH |
192.168.1.88 |
\Movies_E\Common |
Animate_*.7TH |
192.168.1.100 |
\Images |
Colours\Blue.jpg |
192.168.1.88 |
\7thSense Data\Images |
Colours\Blue.jpg |
192.168.1.100 |
\Audio |
Mp3s\loud.mp3 |
192.168.1.88 |
\7thSense Data\ Audio |
Mp3s\loud.mp3 |
Since the source and target shares do not match, but these files are the same, we need to tell BackPack and the server about the differences. This is done by entering a Source Share Alias for each share on the Target (non-Source) servers:
Source Server 192.168.1.100 (note no Source Share alias required for Source server)
Media |
Own Share |
Source Share Alias |
|---|---|---|
Movie |
\Movies\Common |
|
Image |
\Images ( |
|
Audio |
\Audio |
|
Target Server 192.168.1.88
Media |
Own Share |
Source Share Alias |
|---|---|---|
Movie |
\Movies_E\Common |
\Movies\Common |
Image |
\7thSense Data\Images |
% \Images |
Audio |
\7thSense Data\ Audio |
\Audio |
So now, the target server will enumerate its own media from its own shares and BackPack compares against the source in its different shares:
Target |
|
Source |
\\192.168.1.88\Movies_E\Common\Animate_*.7TH |
= |
\\192.168.1.100\Movies\Common\Animate_*.7TH |
\\192.168.1.88\7thSense Data\Images\Colours\Blue.jpg |
= |
\\192.168.1.100\Images\Colours\Blue.jpg |
\\192.168.1.88\7thSense Data\Audio\Mp3s\loud.mp3 |
= |
\\192.168.1.100\Audio\Mp3s\loud.mp3 |
Note that if the Source Share Alias is not correct or missing, the comparison for identifying if files are present or not will fail and any Copy or Delete job will fail, since the source location will not match the shares on the Source server.
In a system with one Source server (with different share structure to the Target servers) & multiple Target servers (all the same), set the Source servers shares, then a single Target server’s shares and aliases and use the Copy dialog to copy to a Target server:
All shares and share aliases are stored locally on each server in Config.XML after you press Save Config.
RAID7th
For Delta servers configured with a 7thSense-specific RAID7th drive configuration, movie files within a single source folder are distributed on multiple separated drives within the server. These are not accessible via a network share as normal, but by using a special placeholder within the share name to indicate that files should be stored according to the RAID7th algorithm.
In order to configure RAID7th on a specific share, use the following {RAID7TH} syntax for the Own Share on the server which has been configured for RAID7th (using the Delta GUI). Note you have to restart Delta Monitor after making any changes to the RAID7th drive configuration in Delta GUI.
Example share mapping for RAID7th:
Own Share:
\{RAID7TH}\Movies
Source Share Alias:
\Movies

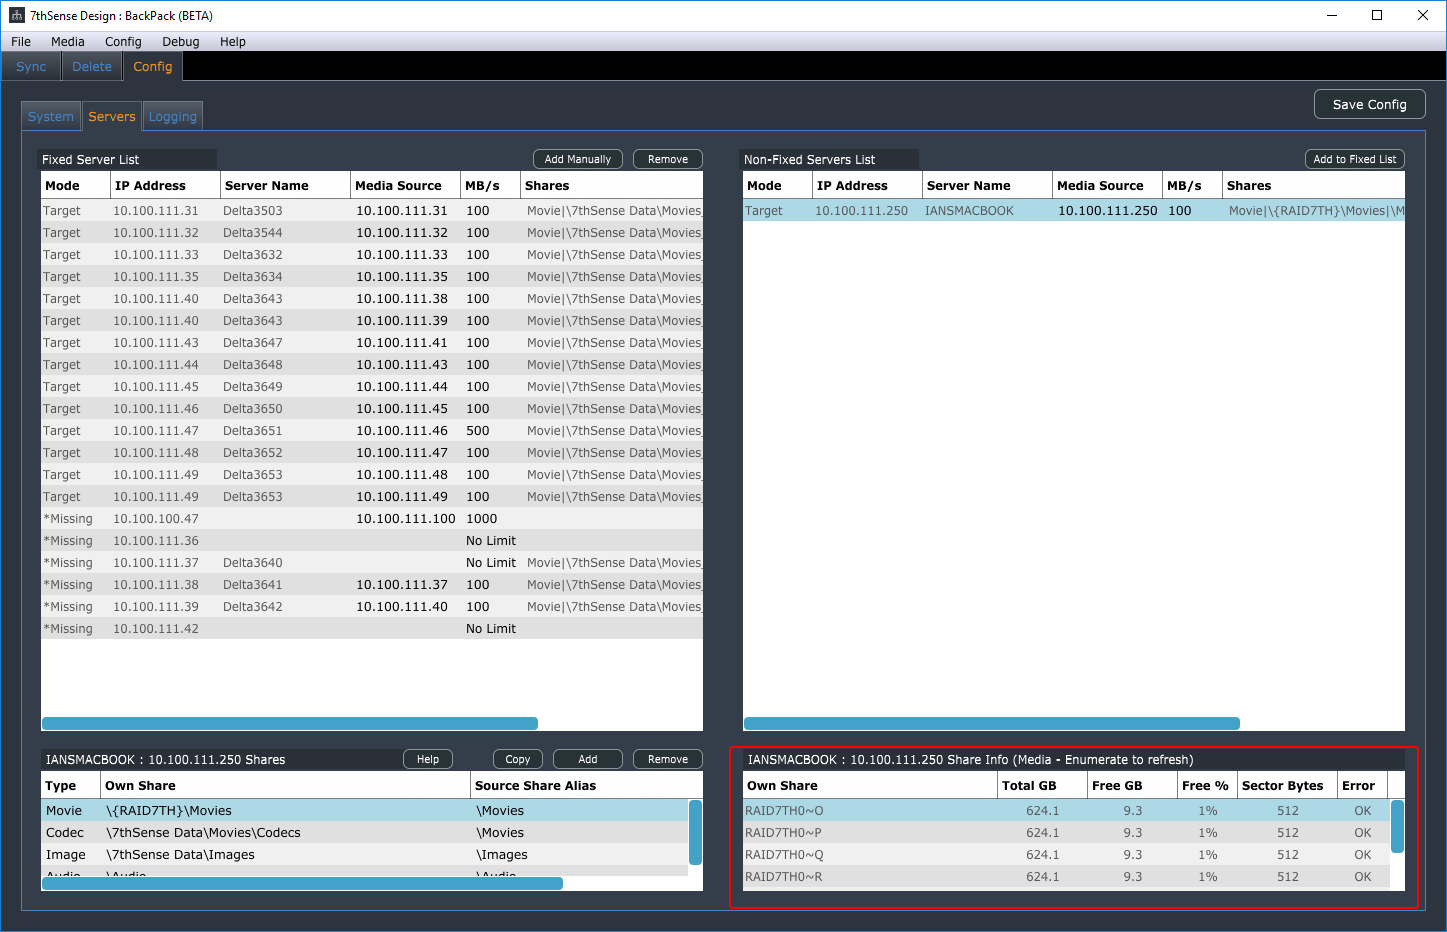
Note that if you omit the {RAID7TH} placeholder, BackPack will attempt to use a normal Windows share to copy into, and if you omit a matching Source Share Alias, this is an incorrect configuration and all files will be copied into a single folder, instead of using the RAID7th algorithm. Compare how RAID7th disks are displayed for a server, with the RAID7th drive letters rather than drive shares:
RAID7th is only applicable to sequential Movie resources, so images, audio or codec movies should not be configured for RAID7th.


