Windows Connections Limit If using a central NAS, ensure that the operating system can handle as many TCP connections as required. Windows 7 or 10, for example, can only handle 20 at a time. |
Enter the name by which you wish to call the backup, in the ‘Enter Backup Name’ text box. If left blank, a standard backup name will be used.* Next, select the type of backup you want to create. Selecting ‘All Configuration’ will select the basic configuration of your server(s). ‘All Data’ will back up everything. If choosing ‘Custom’, then consult the table below for explanations for each custom option.
* Standardized backup names are formatted by [Server Name]_[Year]_[Month]_[Day]_[Time].zip (for example: Delta1234_2018_05_08_1217.zip). This can be reconfigured: see the Delta Server Configuration section for more information.
Selected file sizes affect backup times Selecting 7thSense items (C:\) may be 5 GB or more. Program Files add about another 1 GB. Movies are not included in the backup options. These are very large volumes and copies should be already be held separately. |
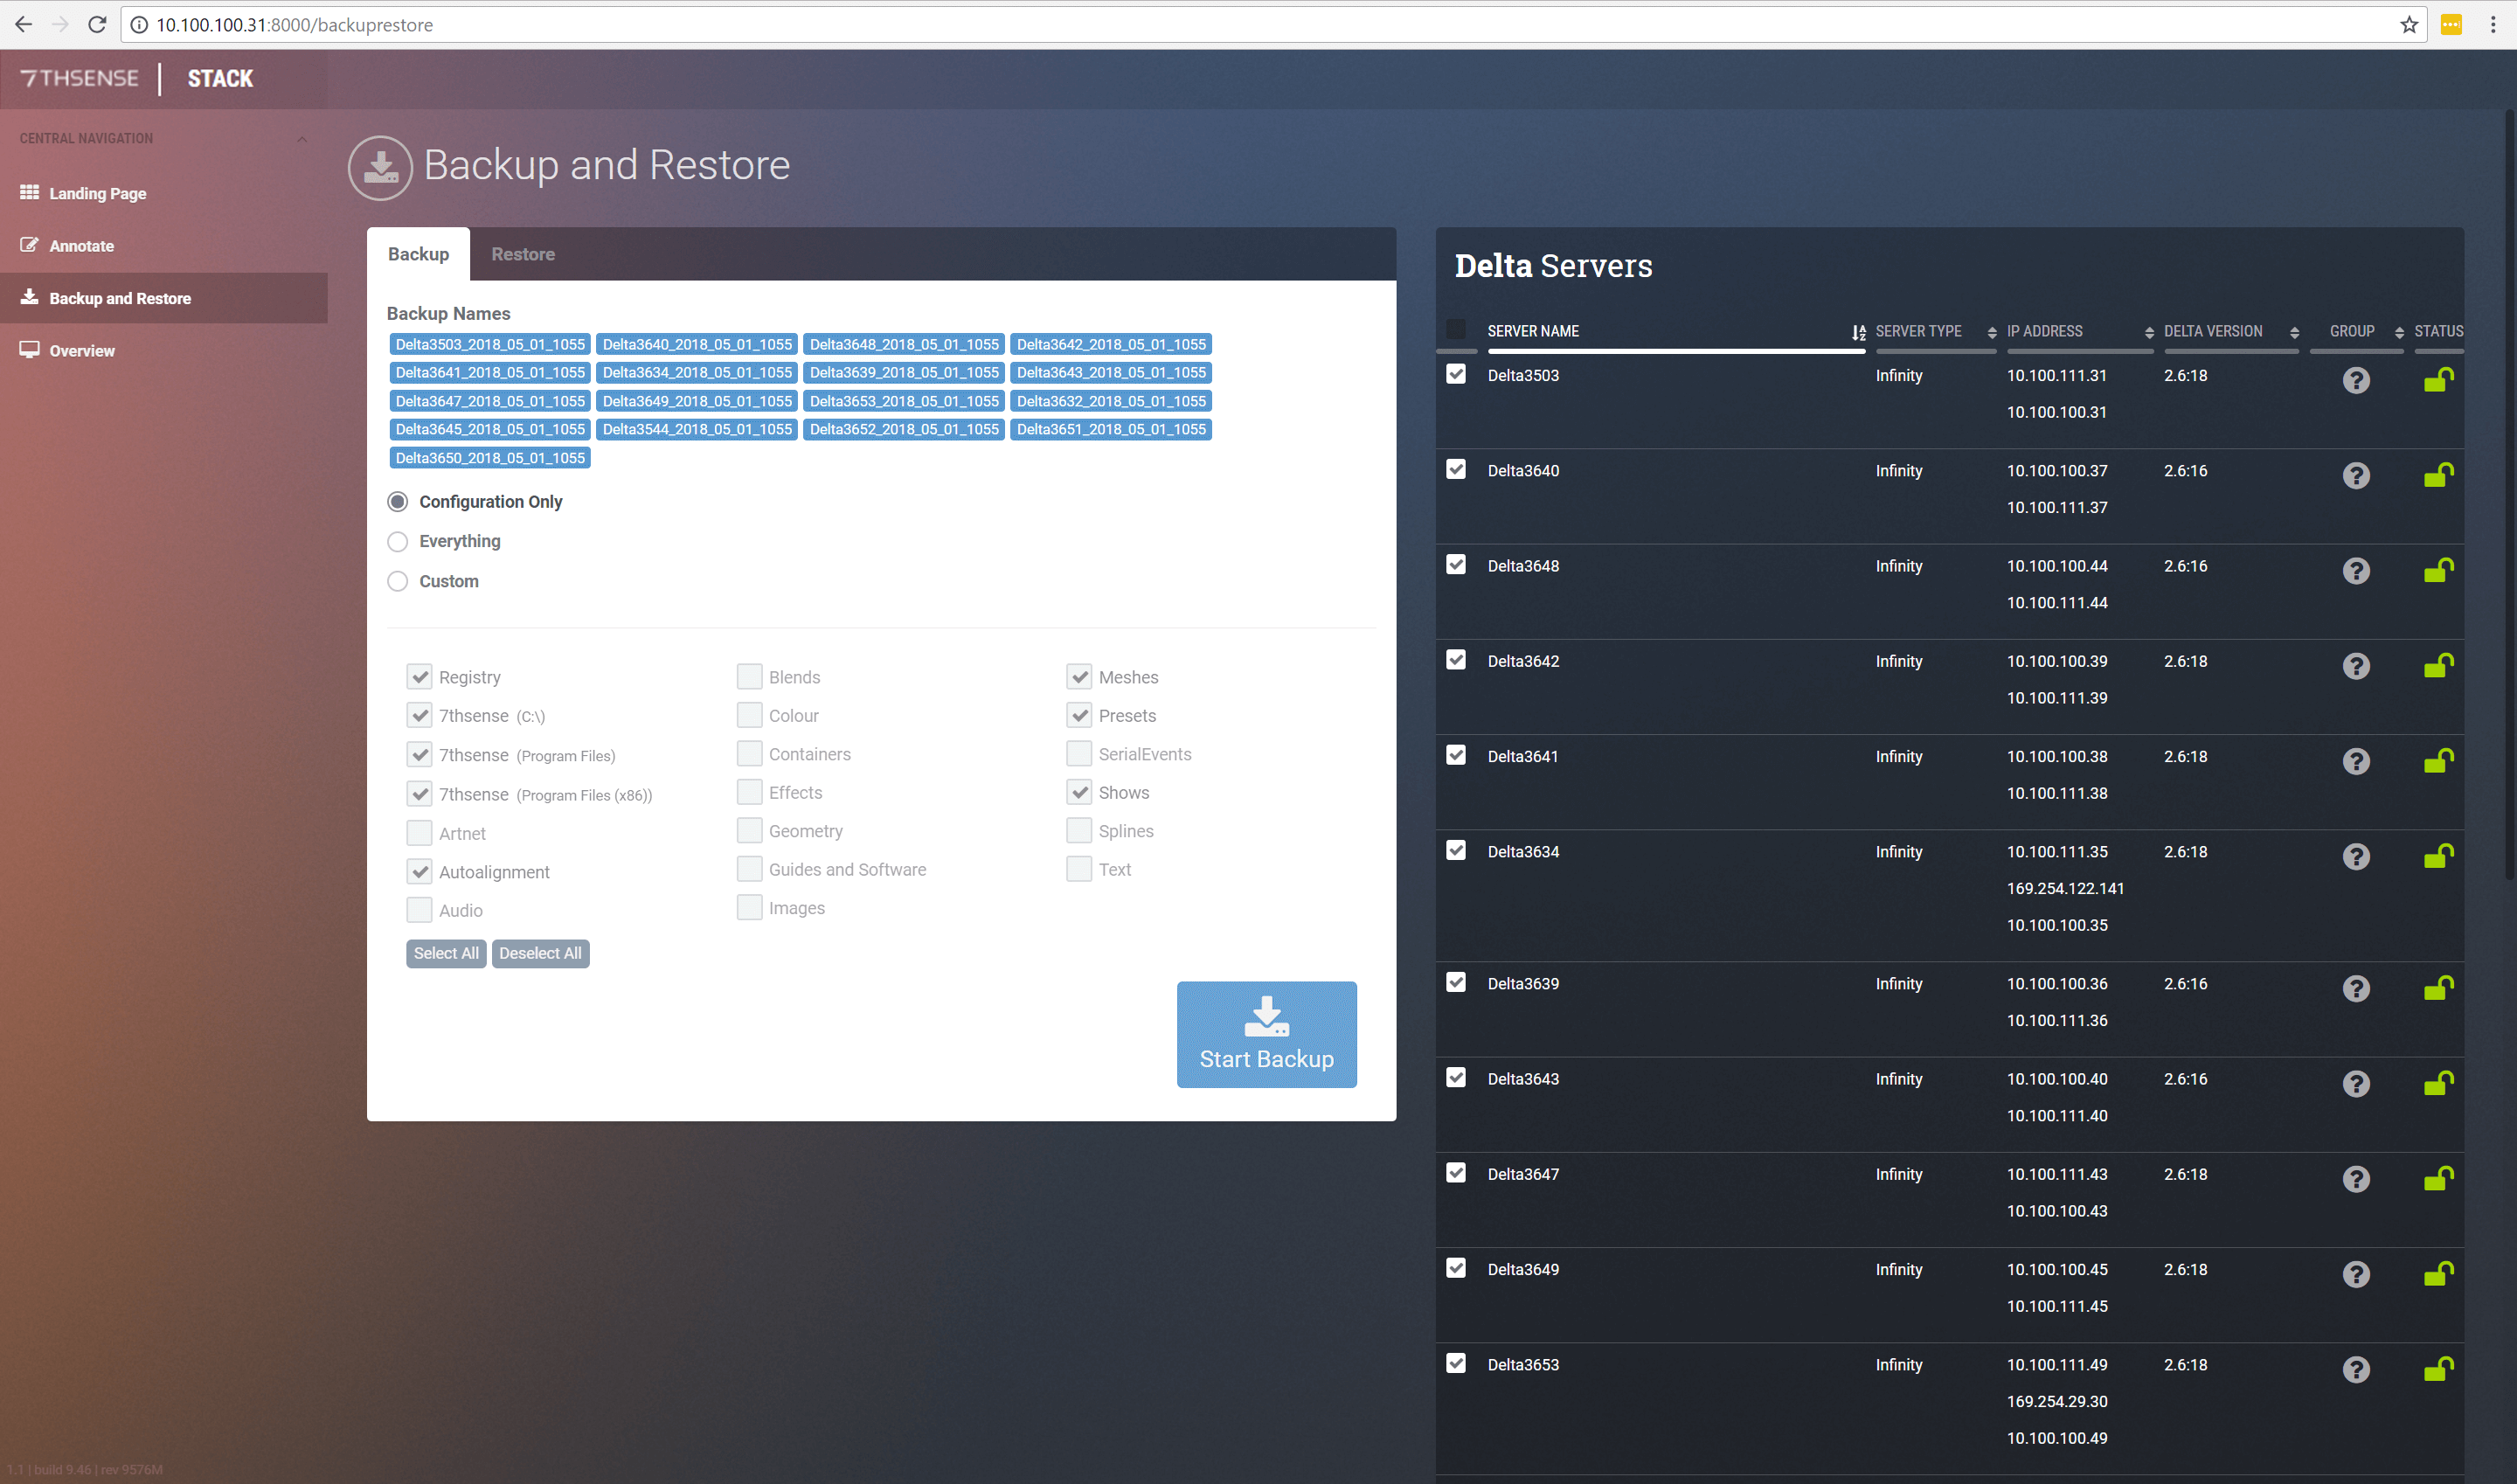
In the panel on the right side select the server(s) you wish to backup using the checkboxes.
If selecting multiple servers, the backup name will become disabled and will show a list of all standard backup names in the list (in blue):
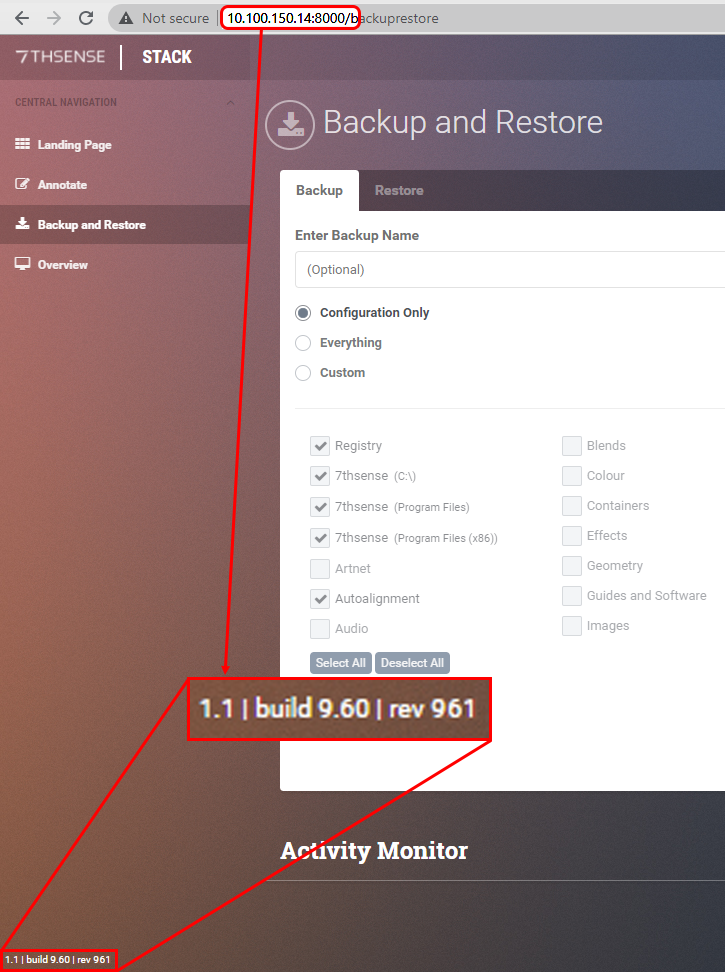
Only servers of the same major version of the software will be shown here for backup and restore. If a known server is present on the network but does not appear in the list, it is worth checking the version of the Stack installation. The software version of the server in the browser address bar can be seen in the bottom left of the browser page: mouse-over the text to highlight:
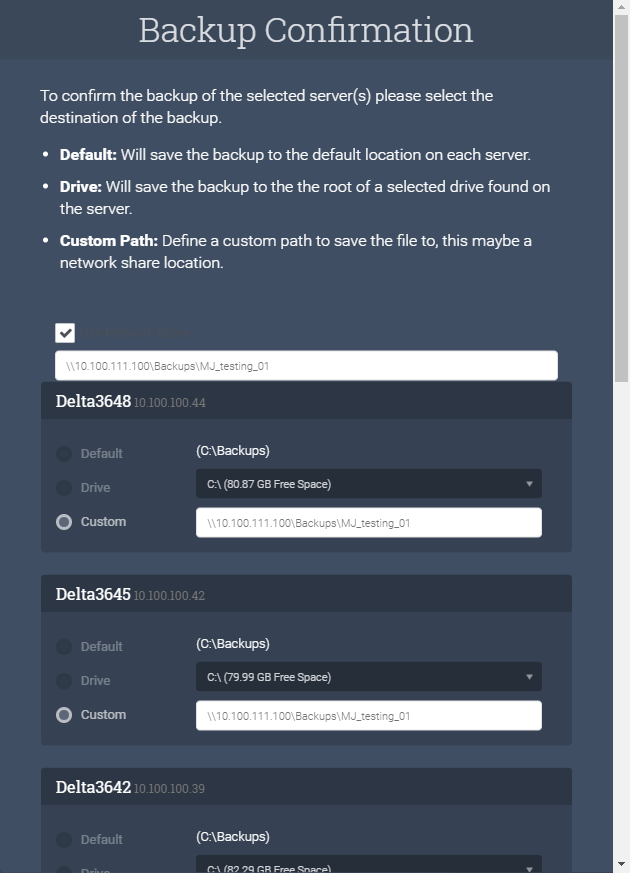
After selecting your backup options and server(s) to backup, press ‘Start Backup’. Here you can confirm the destination(s):
You can backup each server to its default location, to a named drive per server, or back up all to a NAS, for example. To do this, check the ‘Use Network Share’ box and enter the IP and path at the top. This will become the default destination as ‘Custom’ in all listed server destinations.
Below the server list you can Cancel, or Confirm to start the backup.
The Activity Monitor area will now populate with an activity card for each server to show status and progress. Any server’s backup can be cancelled. Status will be Gathering Files, Compressing or Complete. The progress bar is per file, not overall backup stage.

When a server backup is complete, the ‘Cancel’ button becomes ‘Clear’, but any refresh of this page will clear the Complete and cancelled cards.
The activity status per server is also shown in the server list, to the right:
 |
|
In progress |
|
Unlocked |
|
Locked (read only) |


