In Active 3D for mesh mode, two copies of a mesh, each with respective left or right eyepoint, are required.
Paired left- and right-eye media are played to separate channels (e.g. 1, 3, 5 and 7 for the left eye, and 2, 4, 6 and 8 for the right eye). By linking eyes, the same warp and blend is applied to both left eye (odd number) and right eye (even number) channels. Mesh files and their eyepoints are assigned to the respective left and right eye media running on the timeline.
Here is the workflow to achieve this.
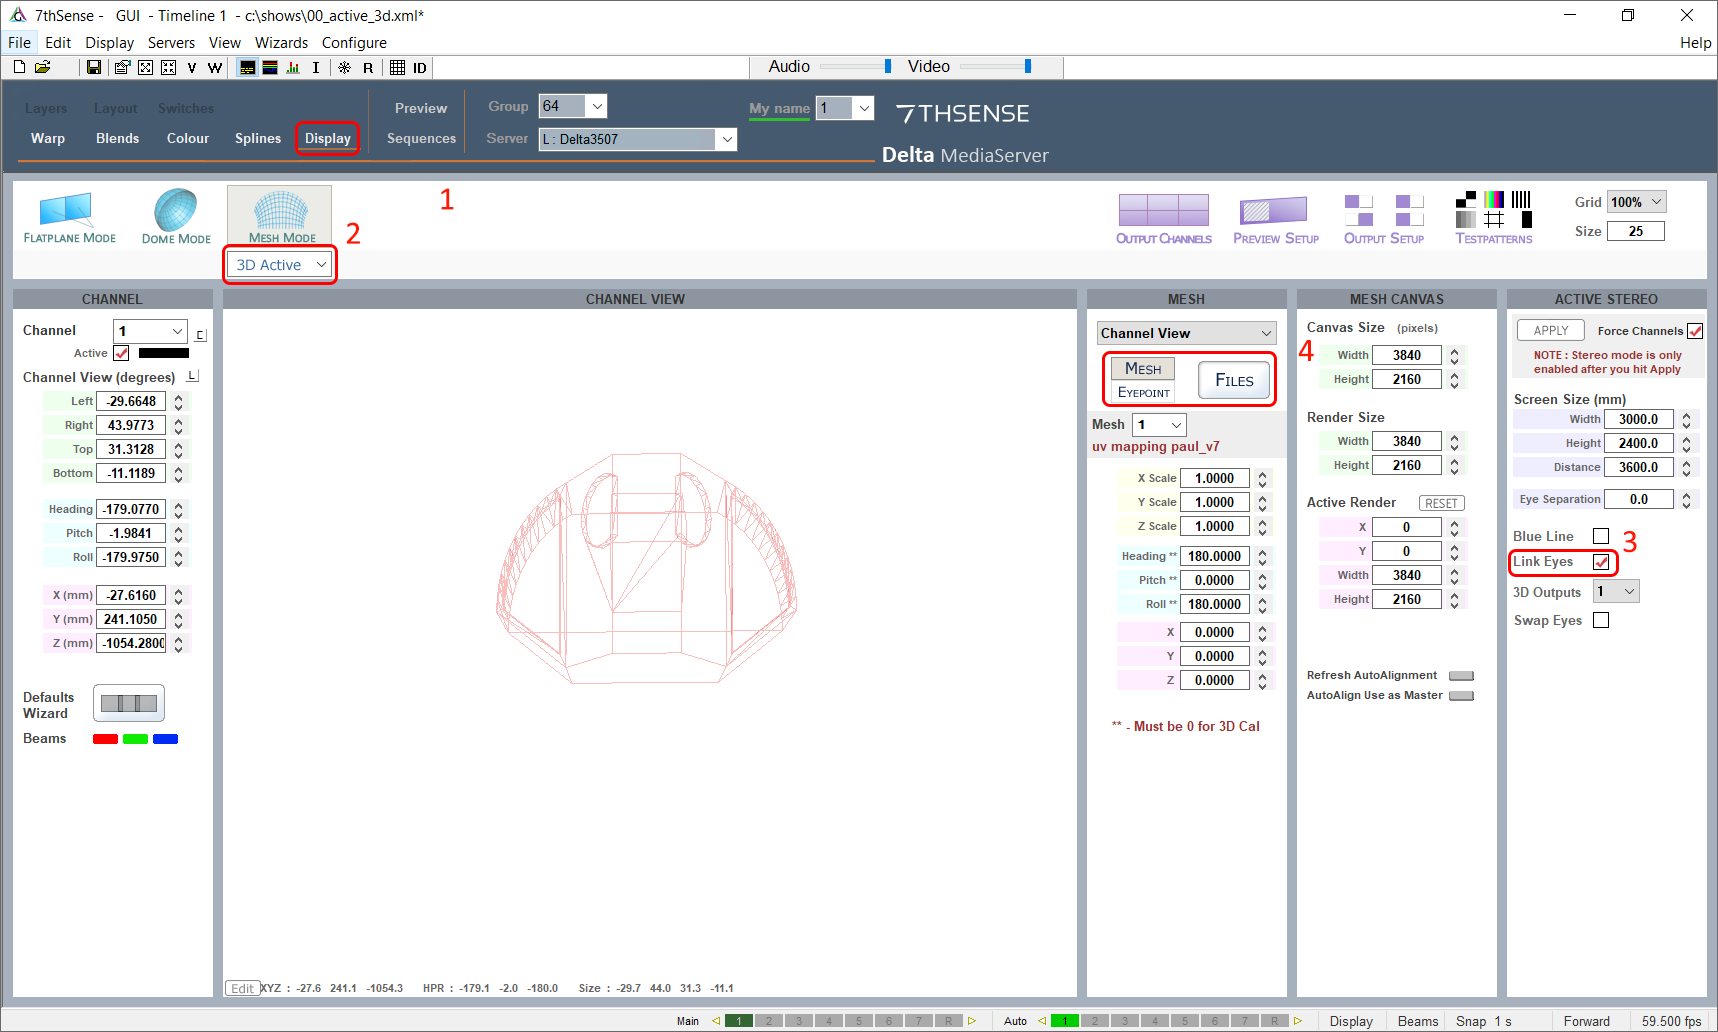
In DeltaGUI, Display workspace (1), select Mesh mode and 3D Active (2). Link Eyes (3) to link any warp and blends applied to left-eye channels also to right-eye channels.
Mesh Files
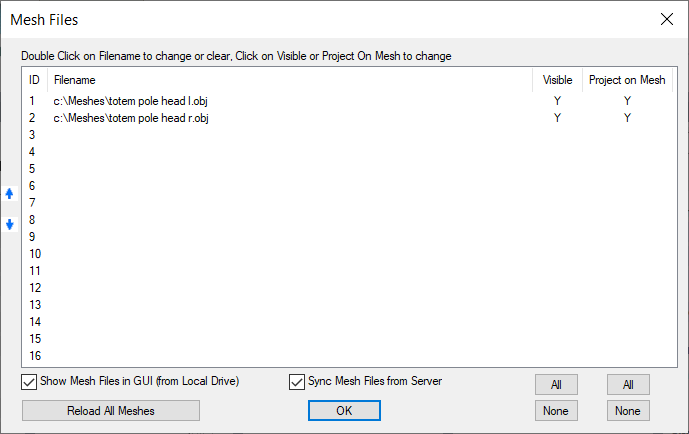
Now add the left and right mesh files of your model or surface.
Click on the Files button (4) and in the new dialog, double-click on the first ID row. Use the browse button to locate the left-eye mesh file you want to use. Do the same for row 2 to add the right-eye mesh file.
Click ‘OK’ to close the dialog.
Eyepoints
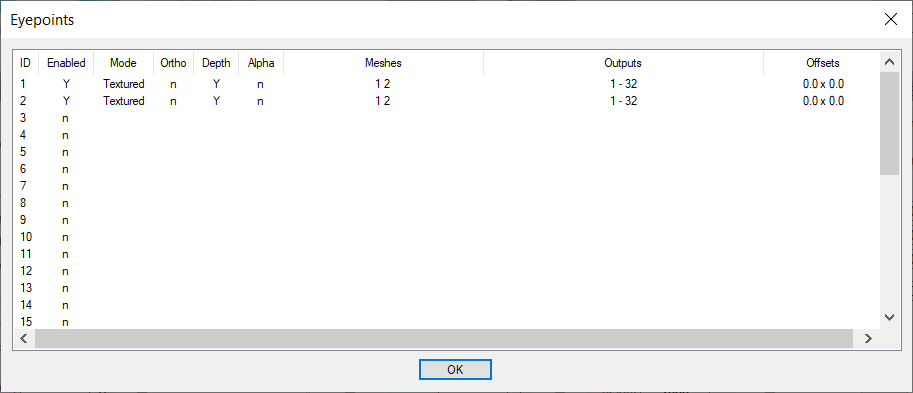
Select ‘Eyepoints’ below ‘Mesh’, and then the ‘Files’ button again (as marked (4) above).
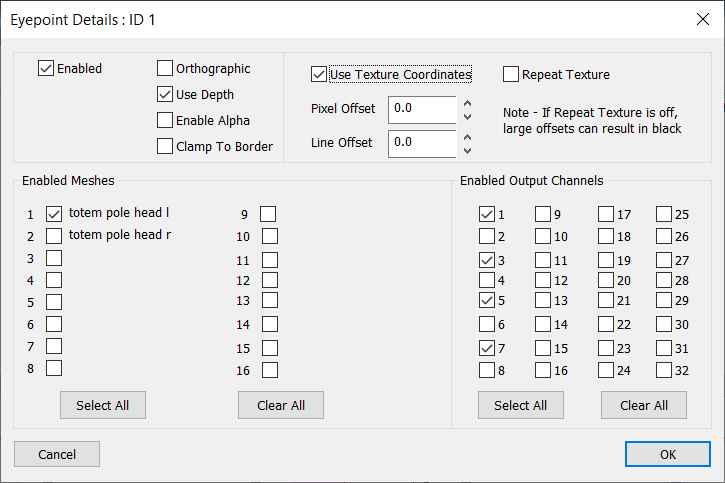
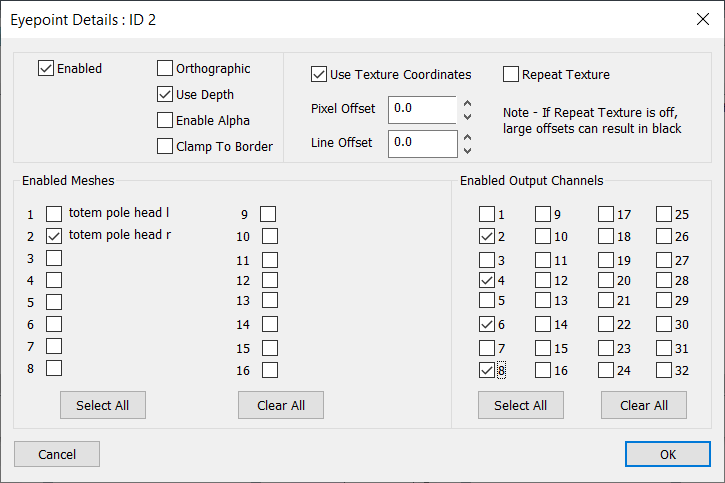
Double-click the row for eyepoint 1 (left mesh), and in the new dialog (below), ‘Clear All’ meshes, and enable just mesh 1. Then under ‘Enable Output Channels’, click ‘Clear All ’ and check just the odd numbered channels n the required range (in the example, for an 8-channel, 4-pair setup):
Click ‘OK’ to close, and this time select eyepoint row 2. Select only mesh 2 and apply only the even numbered channels in the required range:
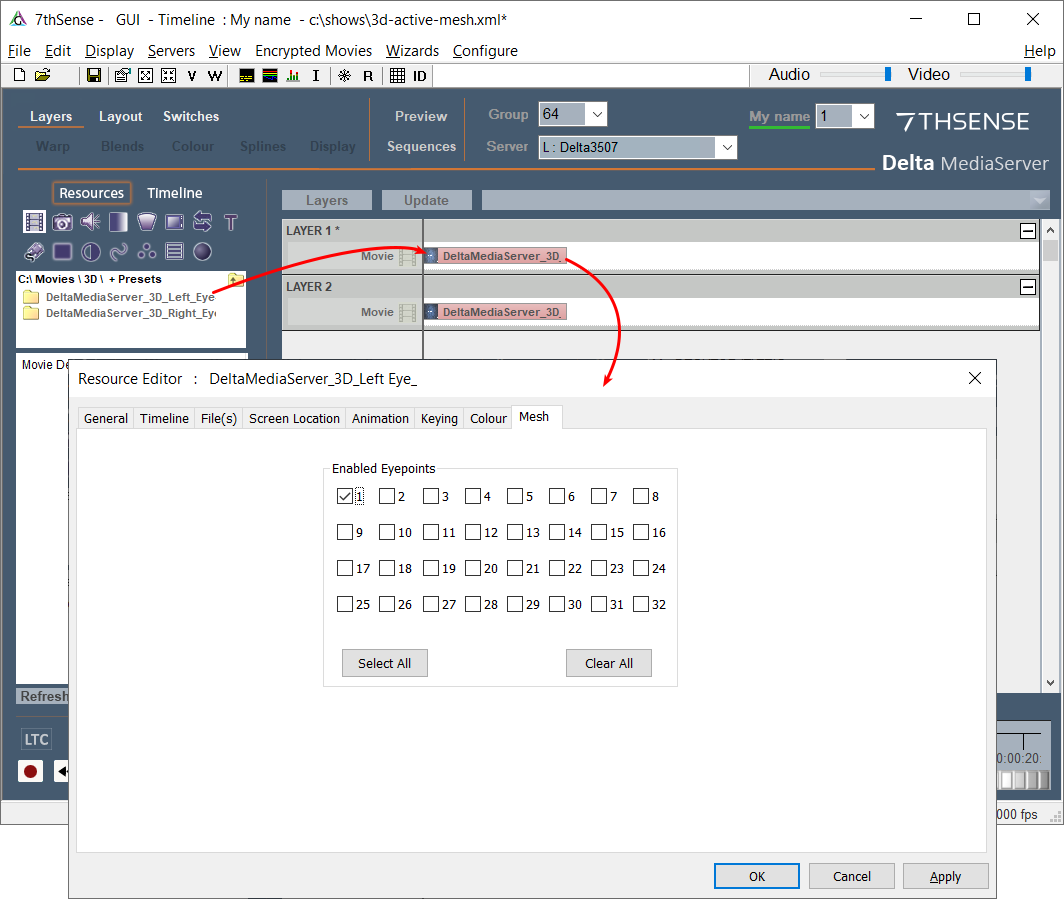
For the left eye media on the timeline, double click to open the resource editor, select the ‘Mesh’ tab, clear all eyepoints and enable only eyepoint 1:
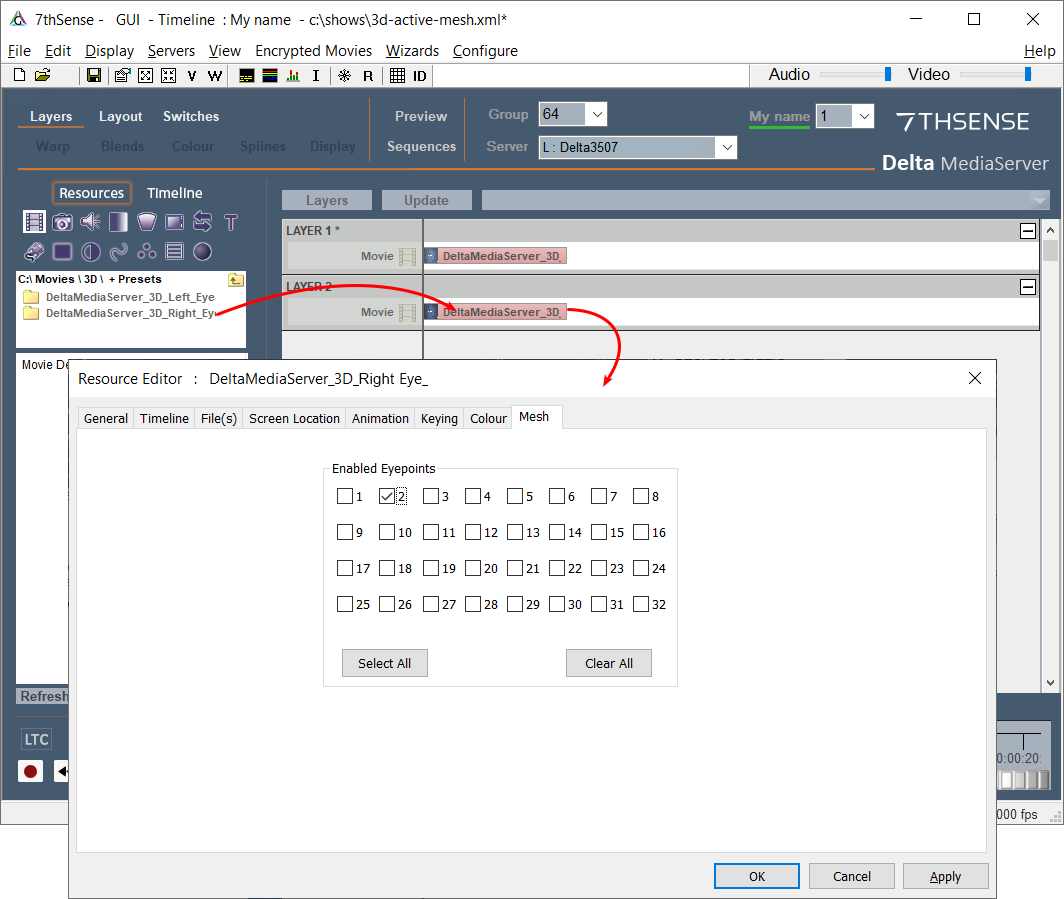
For the right eye media, open the resource editor, clear all eyepoints and enable only eyepoint 2:
Page edited [d/m/y]: 16/06/2020
