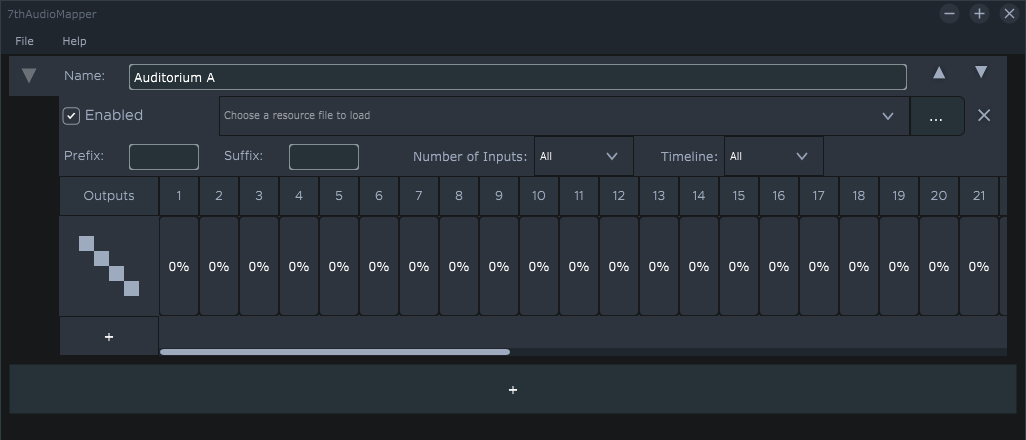
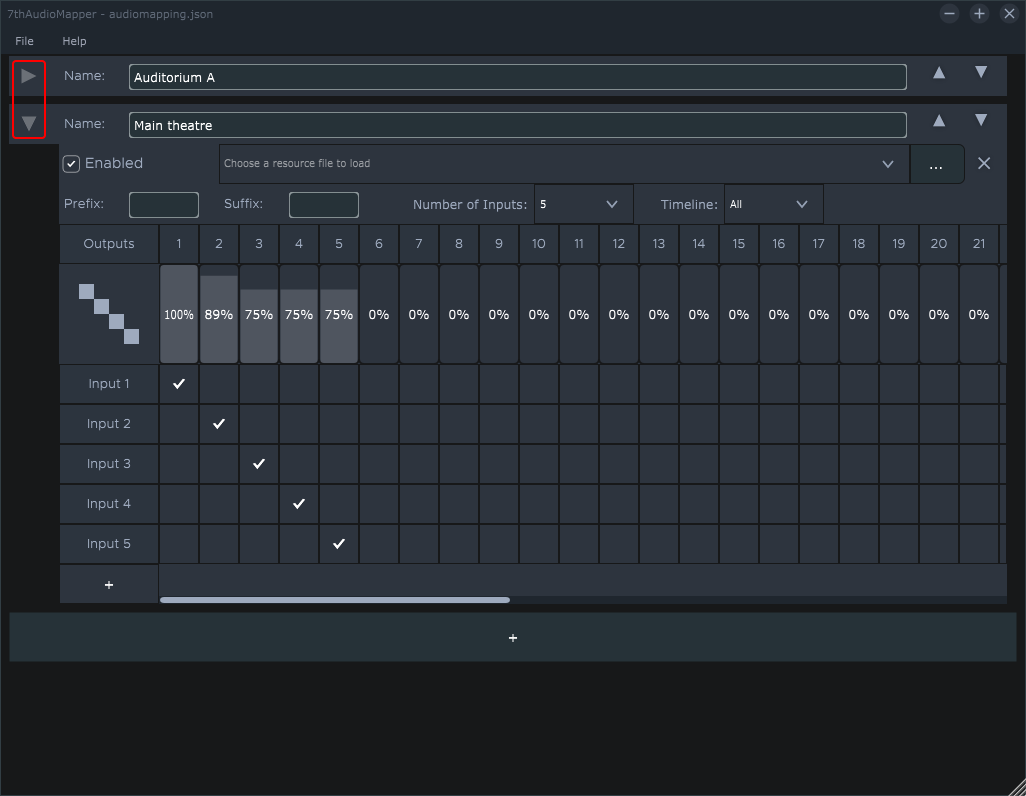
To add a map, click the long grey bar with a + on it. This will display the Name bar:
•Click this bar at any time to add further mappings.
•Name your mapping as you wish, e.g. for its location or function.
Control Arrows in the Name Bar
Left: expand or collapse this mapping.
Expand will collapse all others. Files will open with all mappings collapsed, showing just the Name Bars.
Up/Down: re-order your mappings.
The order is the priority in which any filters they contain are applied.
Expand your new mapping to reveal the filters header. Note at the top that each mapping can be enabled or disabled (tick, left), or deleted (cross, right):
Audio File Filters
File name
Choose a specific file (use the ... to browse)
Prefix
All files starting with these characters.
Suffix
All files of this type.
Number of Inputs
All files with this number of channels (1-64).
Timeline
All files on this Delta Timeline number.
Where filters are left empty, the default is ‘all’.
How Delta uses the Mapping Files
DeltaAudio reads the JSON file and applies all enabled maps according to the filters created. The order of mappings is one of priority: an audio file matching filters in Mappings 1 and 3, for example, will be mapped according to mapping 1 and not mapping 3. If no filters are added, it will simply match all available inputs in every audio file to the mapped outputs.
Mapping Inputs to Outputs
To see all possible output channels use the light grey scrollbar at the bottom of the map.
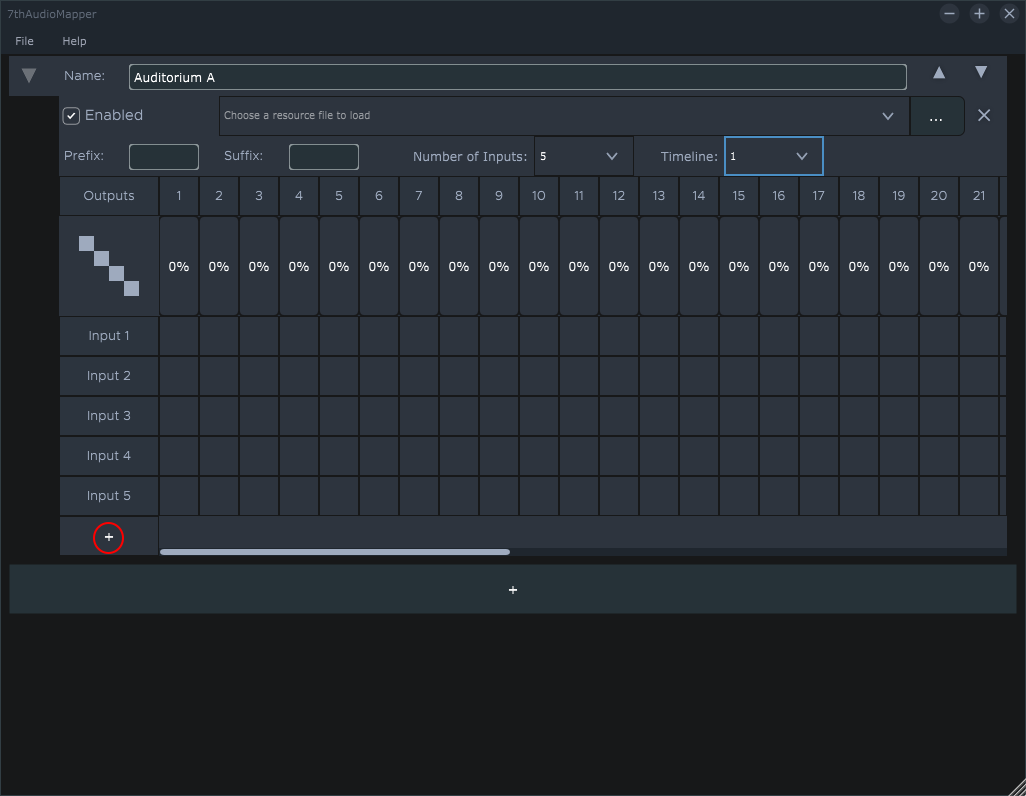
To add an input channel, click the smaller + box on the left. Add an input for every channel in the file(s) available through the filter.
•The channel order in an audio file to be represented as inputs 1 to n here, is a matter for the production designer, who should advise you.
•If you do not want to use an input channel, add it but simply leave it unmapped.
•To delete an input channel (i.e. it is not required) click the ‘Input #’ label. The remaining channels will be sequentially renumbered.
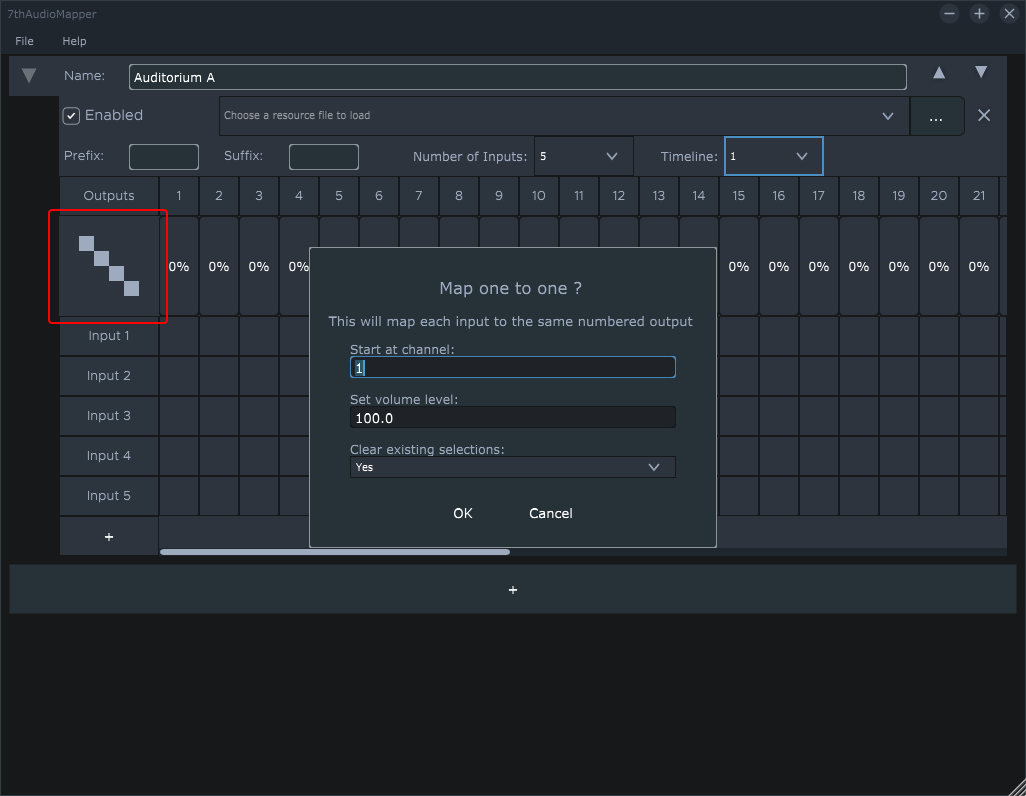
You can now map inputs to outputs, either by clicking in the grid squares, or start by mapping all one-to-one by clicking the icon:
Start at channel
Map sequentially from this output channel.
Set volume level
This will set a default volume level for all channels. These can be subsequently changed individually.
Clear existing selections
If specific mappings have been made in addition to overall one-to-one, these can be protected, otherwise (‘Yes’) they will be cleared.
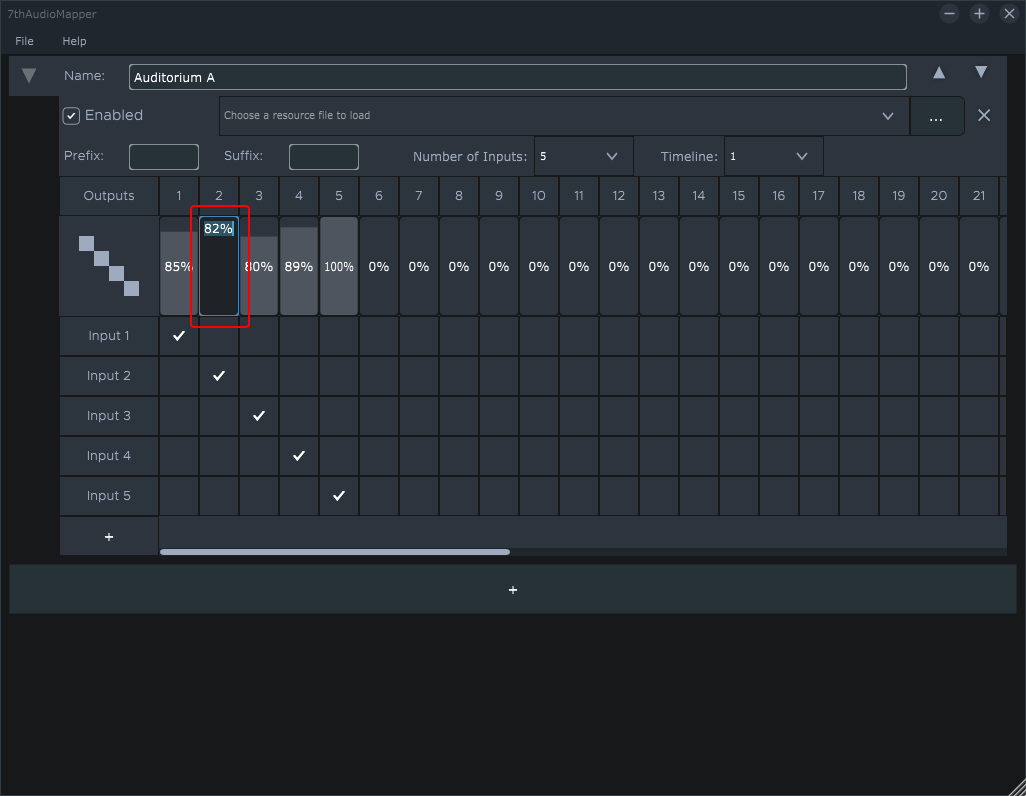
Editing Mapping Volumes
Hovering over a volume enables volume control by mouse-wheel scrolling (30 increments). Alternatively click to enter a specific value:
When there is more than one mapping in the file, only the selected mapping will be expanded:

